
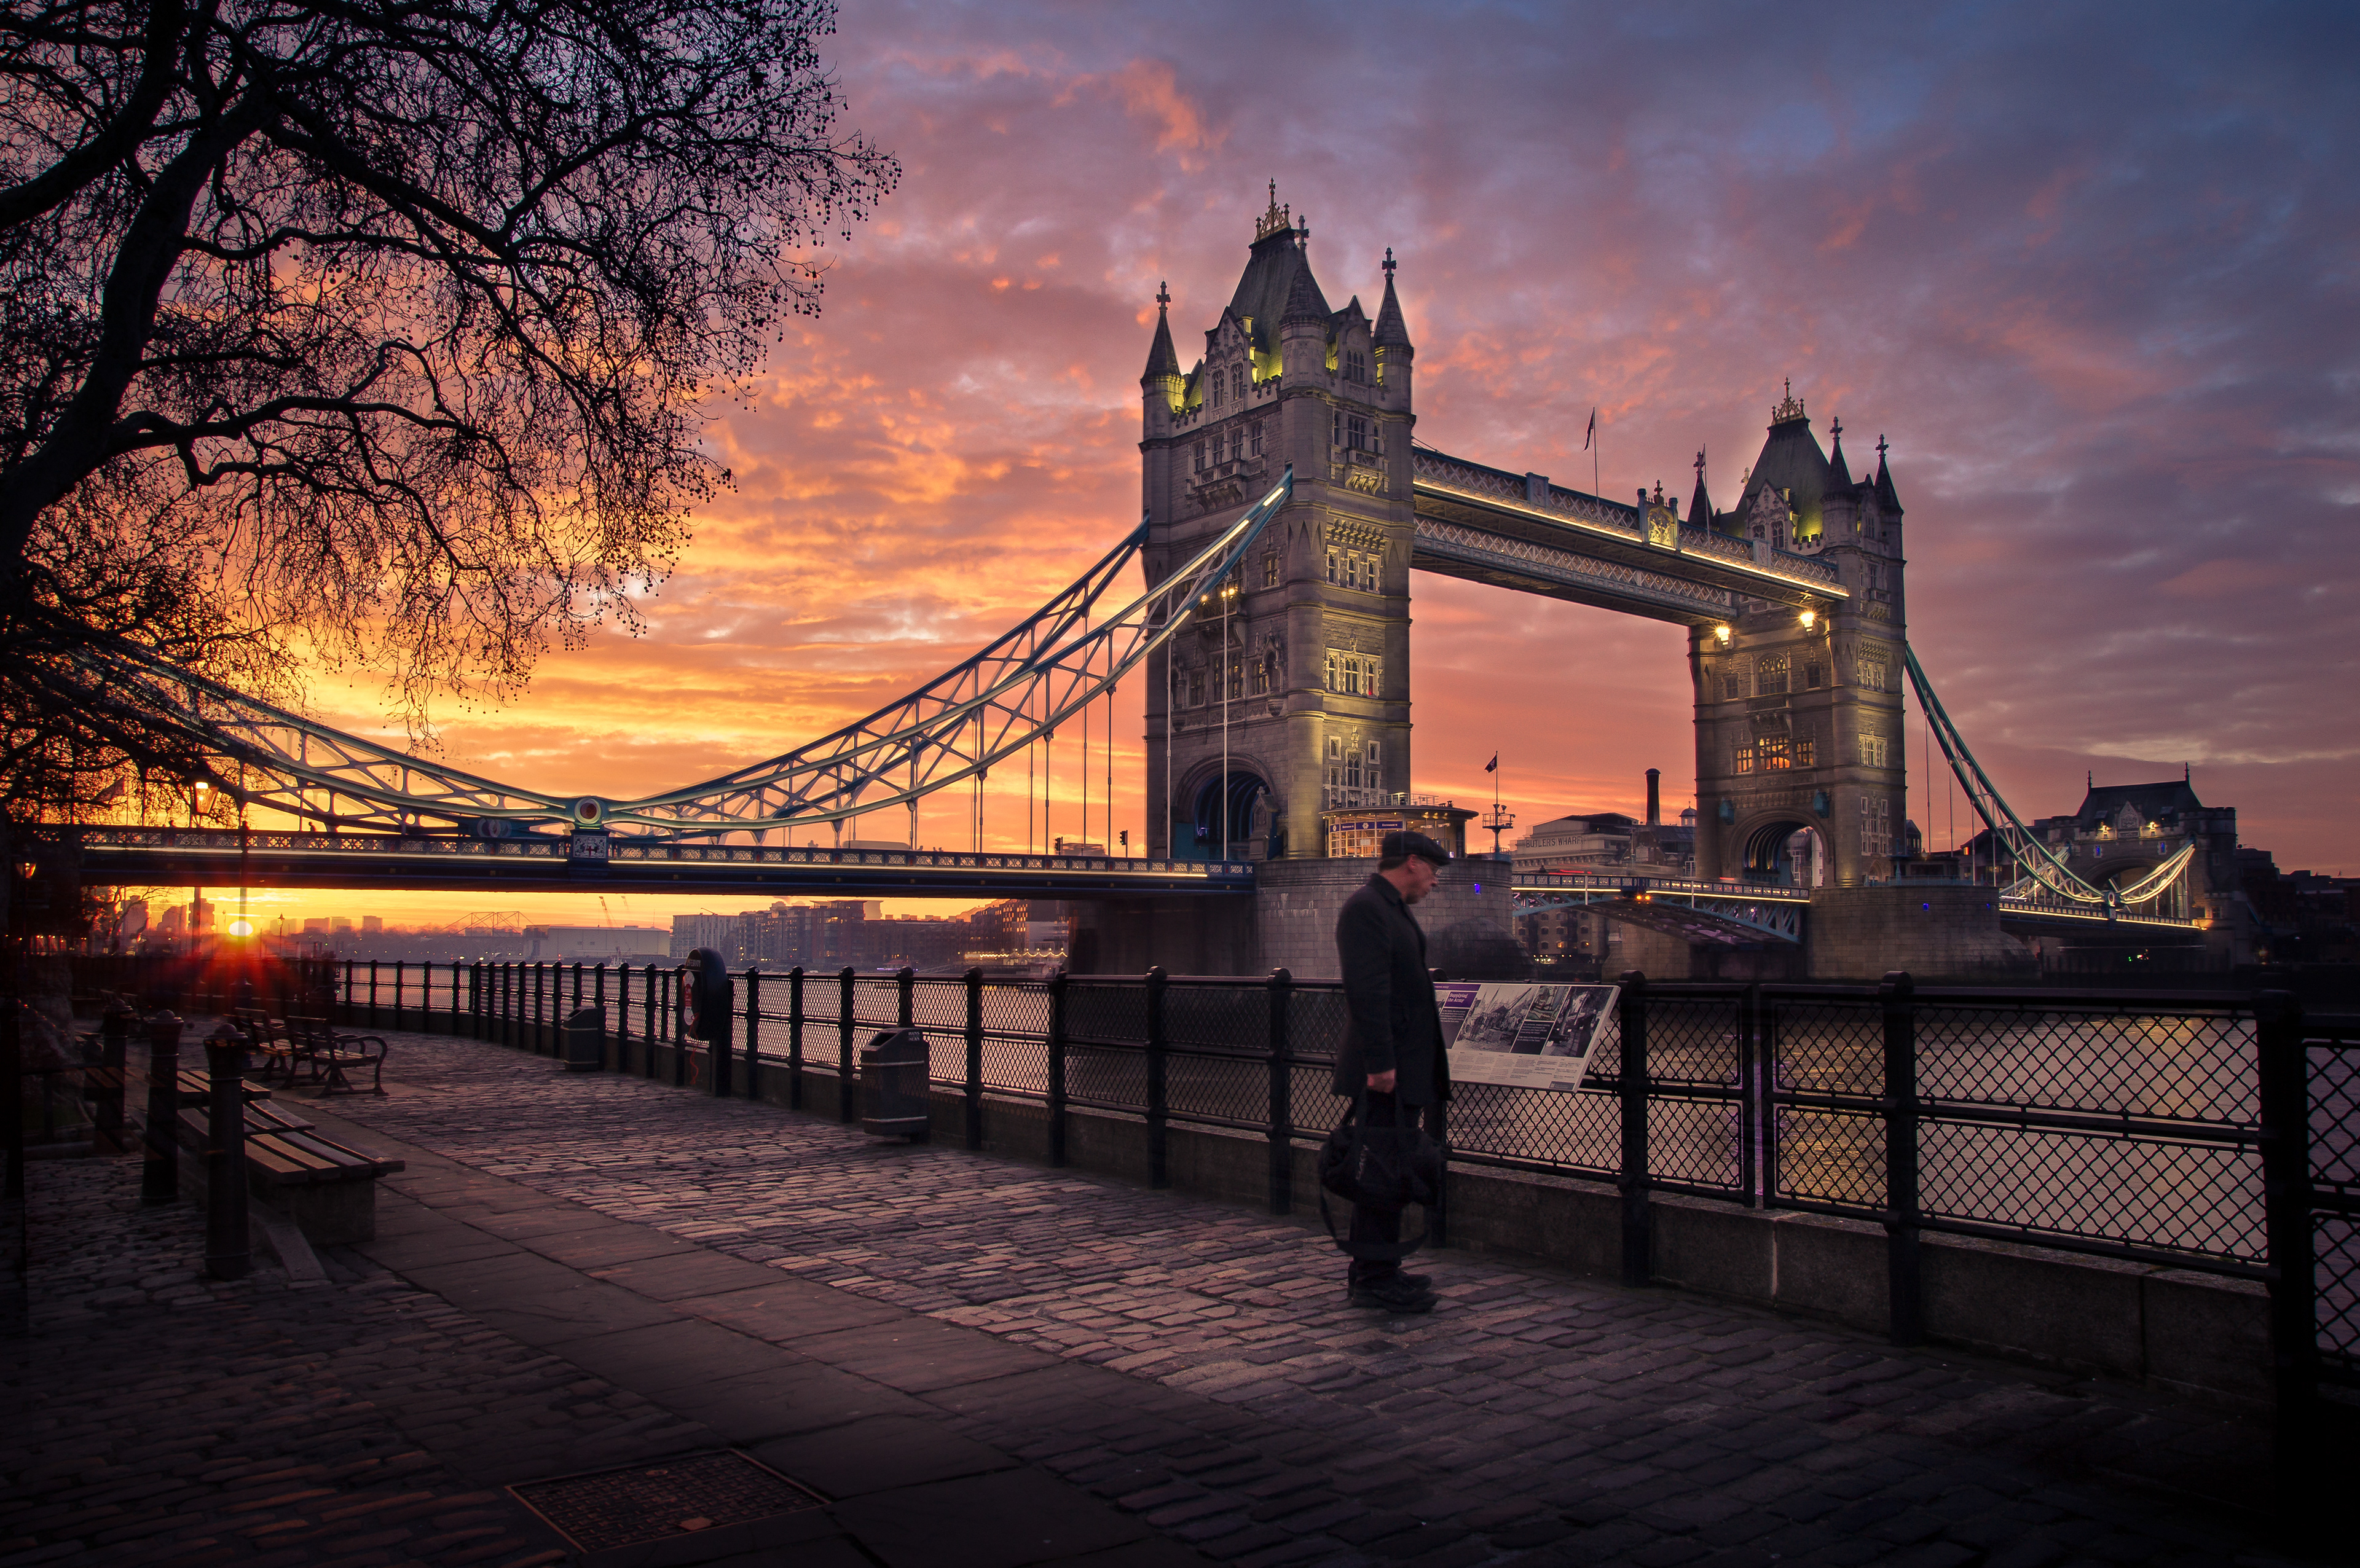
The Visitor At Tower Bridge - Settings: F11, 1/20 sec, ISO 100 @45mm
Cityscapes are captivating canvases that blend urban life with breathtaking architecture, offering a rich tapestry of visual opportunities for photographers. Whether you're a novice or a seasoned pro, the art of composition in cityscape photography can transform your images into masterpieces. In this article, we'll delve into the rules, tips, and creative techniques that will help you create visually appealing cityscape photographs. Let's embark on this journey together.
The Location
Obviously, this varies depending on what your city of choice is. My experience of city scape shoots has taken me from London, Paris, New York, Baltimore and Philadelphia. My favourite of all of these has to be London, purely based on the little distance you have to travel to experience a change in vibe, character and architecture.
Forward Planning
Forward Planning
City shooting is all about the planning phase, please plan, plan and plan! Make the most out of every moment you have, but also allow a little wiggle room for spontaneous unplanned shooting that may catch your eye.
My city shooting plans first of all start with research and inspiration. I have a research file of inspiring shots that I see from Instagram, Flickr, TikTok, Pinterest, PhotoCrowd etc., you name it and I make a note of it.
I then prioritise the shoot locations, being realistic, and within an achievable travel distance of one another. I start by utilising Google Maps and plotting my desired locations with pins within Google Maps to get a visual representation of the spread across the city. I then proceed by connecting them together by utilising the walk and tube/metro travel functions within Google Maps to understand the most time efficient way of getting to each in a day’s shoot.
I pick my top location as my starting point and tend to stay in a hotel close to this point rather than wasting an hour travelling across the city early in the morning. I often plan a circular route for the day too, so I can leave my overnight case at the hotel and can pick it up after my days shoot. I will plan for the first shoot location in depth, research the sunrise time and direction and scope the location out the evening before to ensure the best vantage point is known. This is when your inspiring image collection can come in handy!
A life saver for me is to print the itinerary with times and example location images as a point of reference for my days shooting. I detail on hear the tube/metro stations and travel times to each location, so I have arrival and departing times as well as how long I have to shoot at each location.
Starting at sunrise I can often get 10 shoot locations plotted and planned for a 5pm finish. I will more often than not give myself 20 to 30 minutes at each location to set-up and capture the image I need. Some locations take a little longer, some shorter, sometimes the tube is busy, other times I find new points of interest. As long as you generally stick to your schedule and you don’t miss that last train or flight home, you’re okay, but a rough itinerary and travel plan is vital to ensure you get the most from your visit.
Packing My Bag
Invest in quality gear, but remember, it's the photographer, not the equipment, that makes a great cityscape image. A sturdy tripod, wide-angle lens, and a camera with manual settings are essential. The right gear empowers you to execute your creative vision more effectively.
You’ll be on your feet all day, bustling amongst the tube crowds and walking long distances. My Garmin Watch step counter tracked me walking 14.5 miles on my last London trip, so travel as light as you can. I pack my camera body, the Sigma 2.8 Art 24-70mm lens, filters, camera strap, tripod and spare batteries – that’s all you’ll need. If you have a smaller profile camera bag it works out much easier. If you have space, perhaps pack your longer lens to pick out some of the detail on buildings, I tend to pack in my Sigma 2.8 Sports 70-200mm for this purpose.
I also make sure to pack a couple of snacks and bottled water.

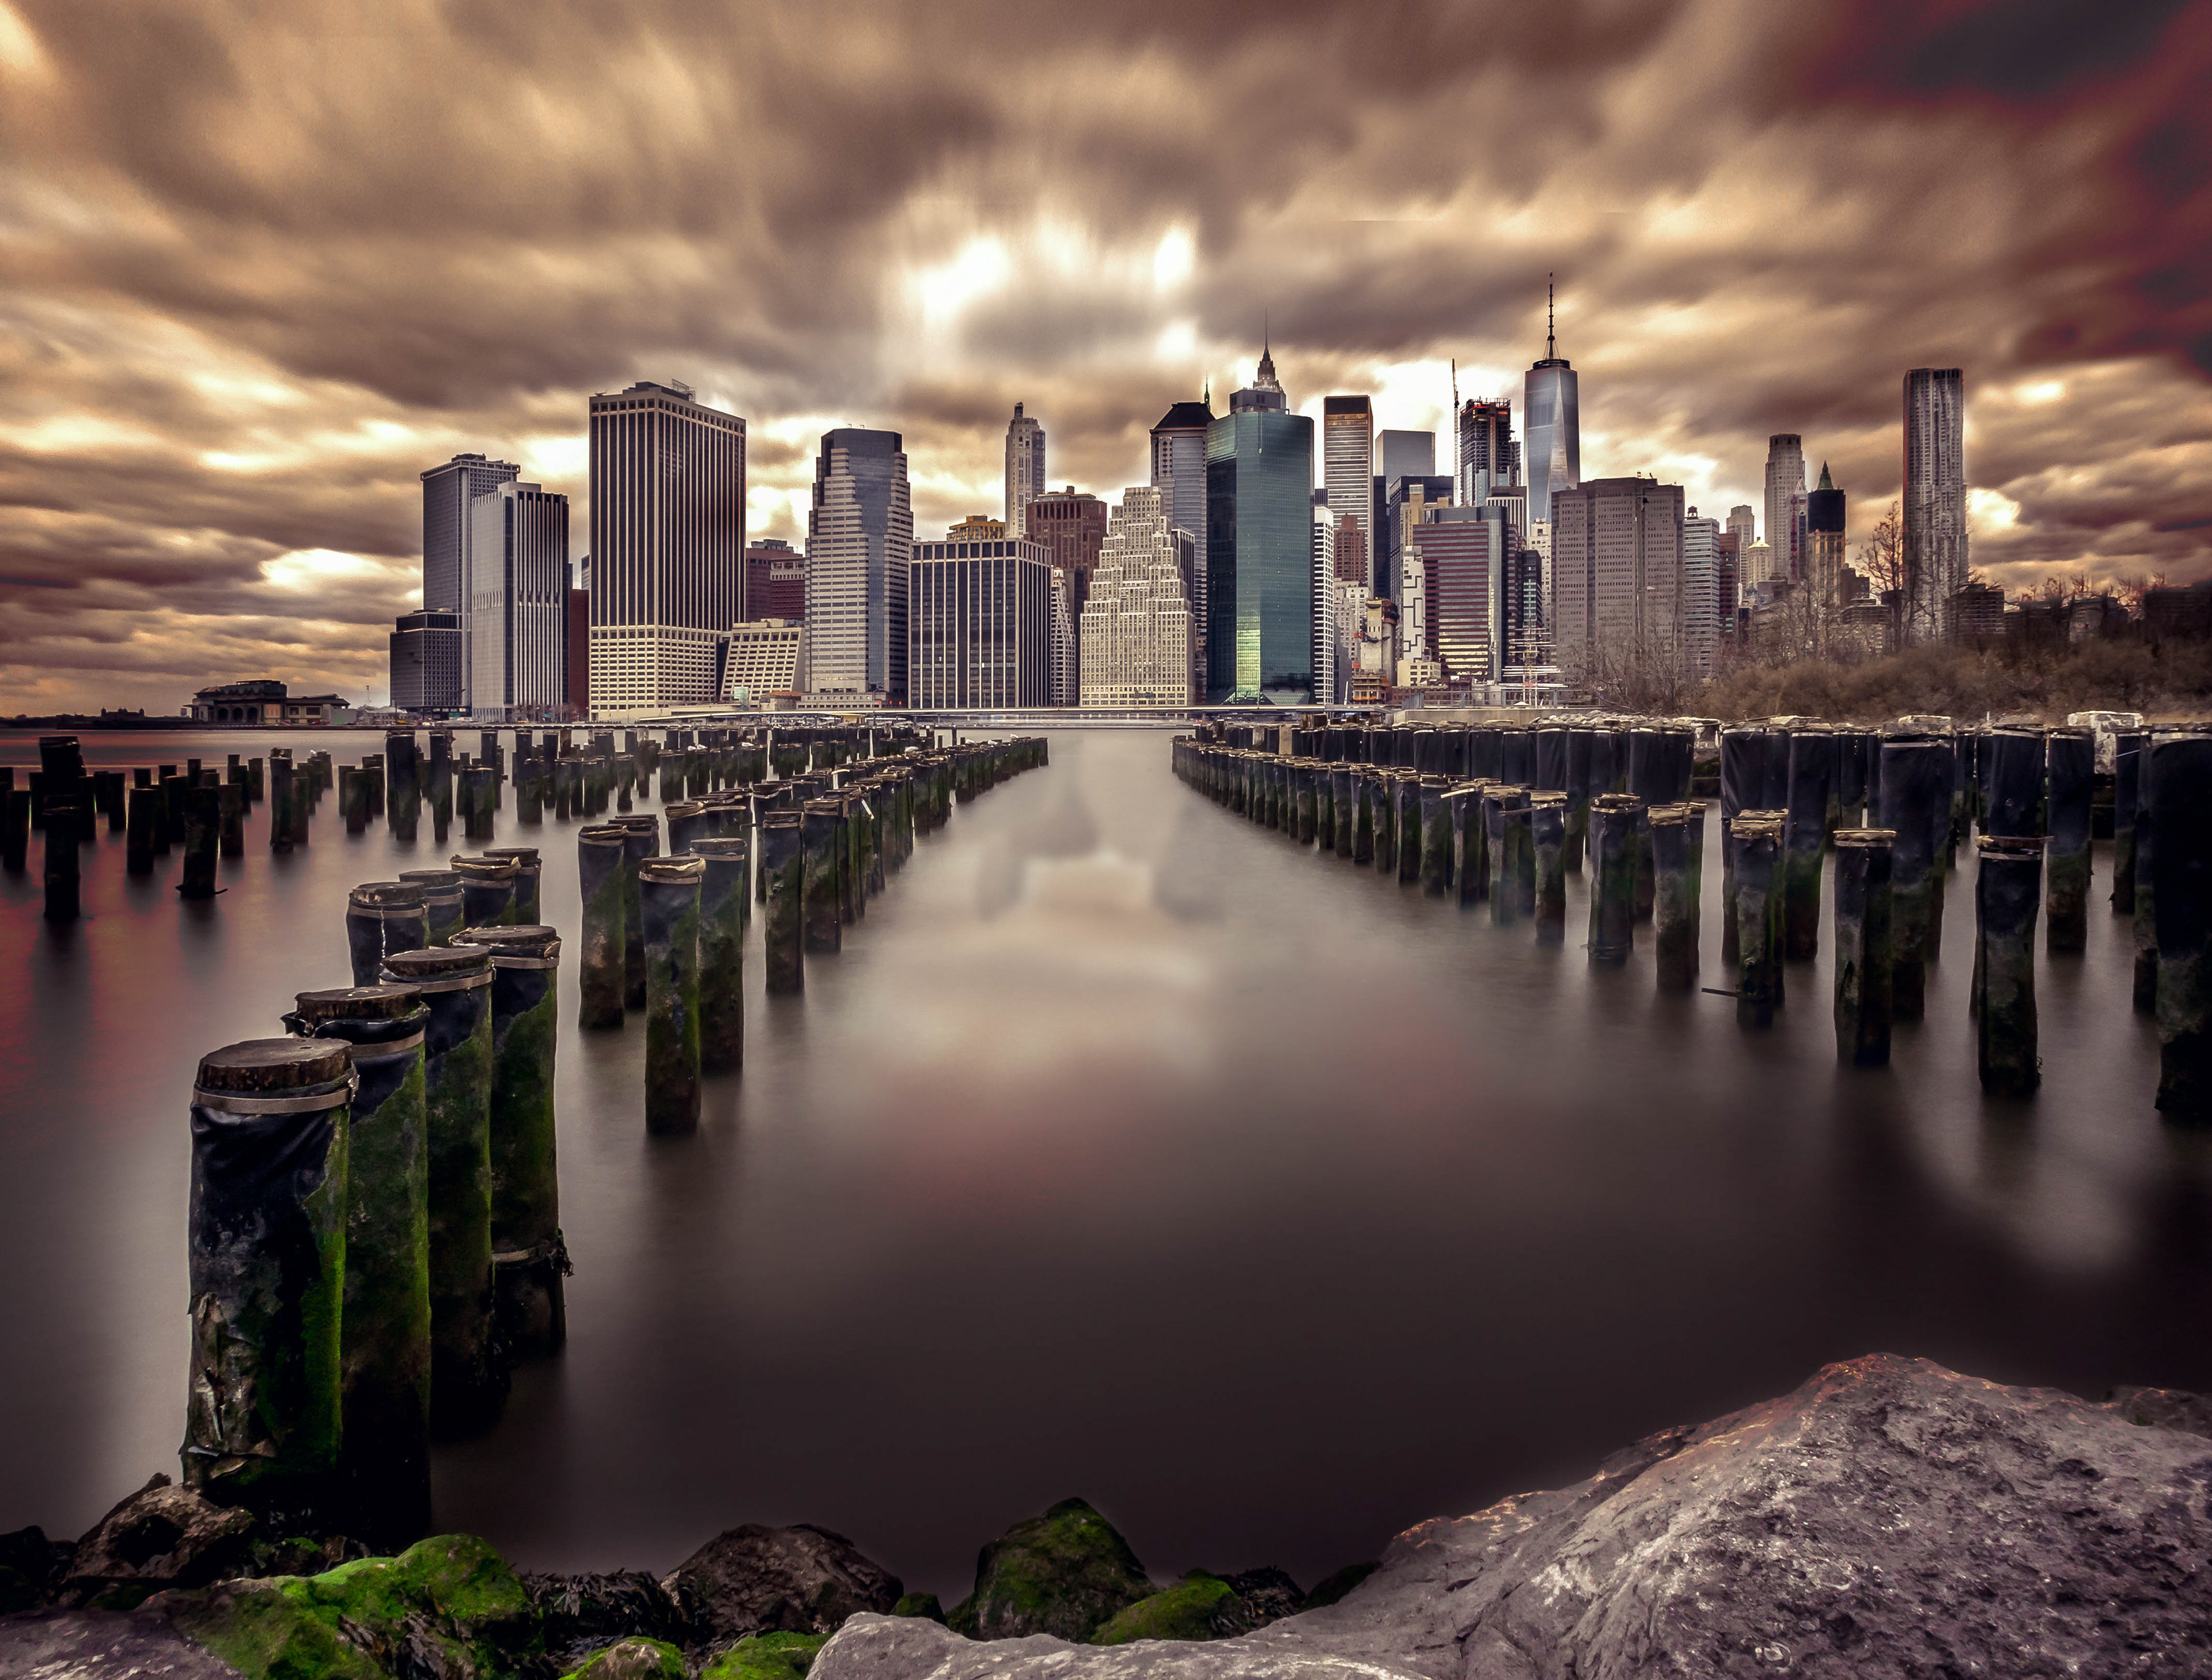
Lower Manhattan, New York - Settings: F8, 30 sec, ISO 100 @27mm
On Location
The first thing to pick up is a Travel Day Card, particularly for London, where for £13.70 you can travel all day via tube or bus to your locations – bargain!
My City days are usually blended with a mix of planned shoots, as detailed above and are very City Scape/ Landscape focussed, mixed with a blend of Street Photography and Architecture on my commutes in between each location. For more on Architecture and Street photography please see the separate ‘How I Shoot’ sections for more detail on these genres – if they are not on the website yet they will be soon, so stay tuned!
I tend to always shoot City Scapes on the tripod, shooting at around F11, ISO 100 and adjusting the shutter speed to bring my histogram into an acceptable range. These are my slower, planned more thought out City Scape shots that I enjoy. Remember to try different focal ranges, making sense of the urban jungle in front of you. Also keep shooting as the sun rises as the sky and the buildings constantly change as the morning light changes.
For City Scapes my opening shoot is always a wide view from a vantage point across the city during Sunrise, so iconic locations like Brooklyn Bridge, Tower Bridge, and St Pauls etc. always look great with those dramatic morning skies. Although I’ve been inspired by my research I always challenge myself to find different and unique perspectives on the iconic landmarks. For example low to the ground, shoot close in, shooting upwards or finding a unique subject in your image to make your images yours.
Lower Manhattan, New York - Settings: F16, 19 sec, ISO 100 @24mm

Battersea Power Station, London - Settings: F11, 13 sec, ISO 100 @67mm
As you progress around the city don’t settle for the easy locations, don’t be lazy, run little scouting walks to see if there are other perspectives. Question I constantly ask myself are, how can I get higher, how can I get lower, what subjects can I include in frame, are there any other points of interest I can include.
Also think about what makes this city or particular location iconic and try to add that element in, for example London bus, NYC Taxi’s etc. and experiment with different shutter speeds to get a streak of colour opposed to a freeze frame. I often like to use slower shutter speeds to blur commuters or traffic, and often locate a static subject in frame like a person. Any way to bring interest and dynamism into the shot will help lift the final result.
Water is always a good source of interest, be it a river, bay or fountain. I’ve even tried pouring some water on a smooth surface to create reflections and different perspectives. Building reflections are also another good point of interest, particularly within areas with high rise buildings. I also like finding juxtapositions within my images, new vs old, smooth vs rough, bright vs dark etc. The options are endless.
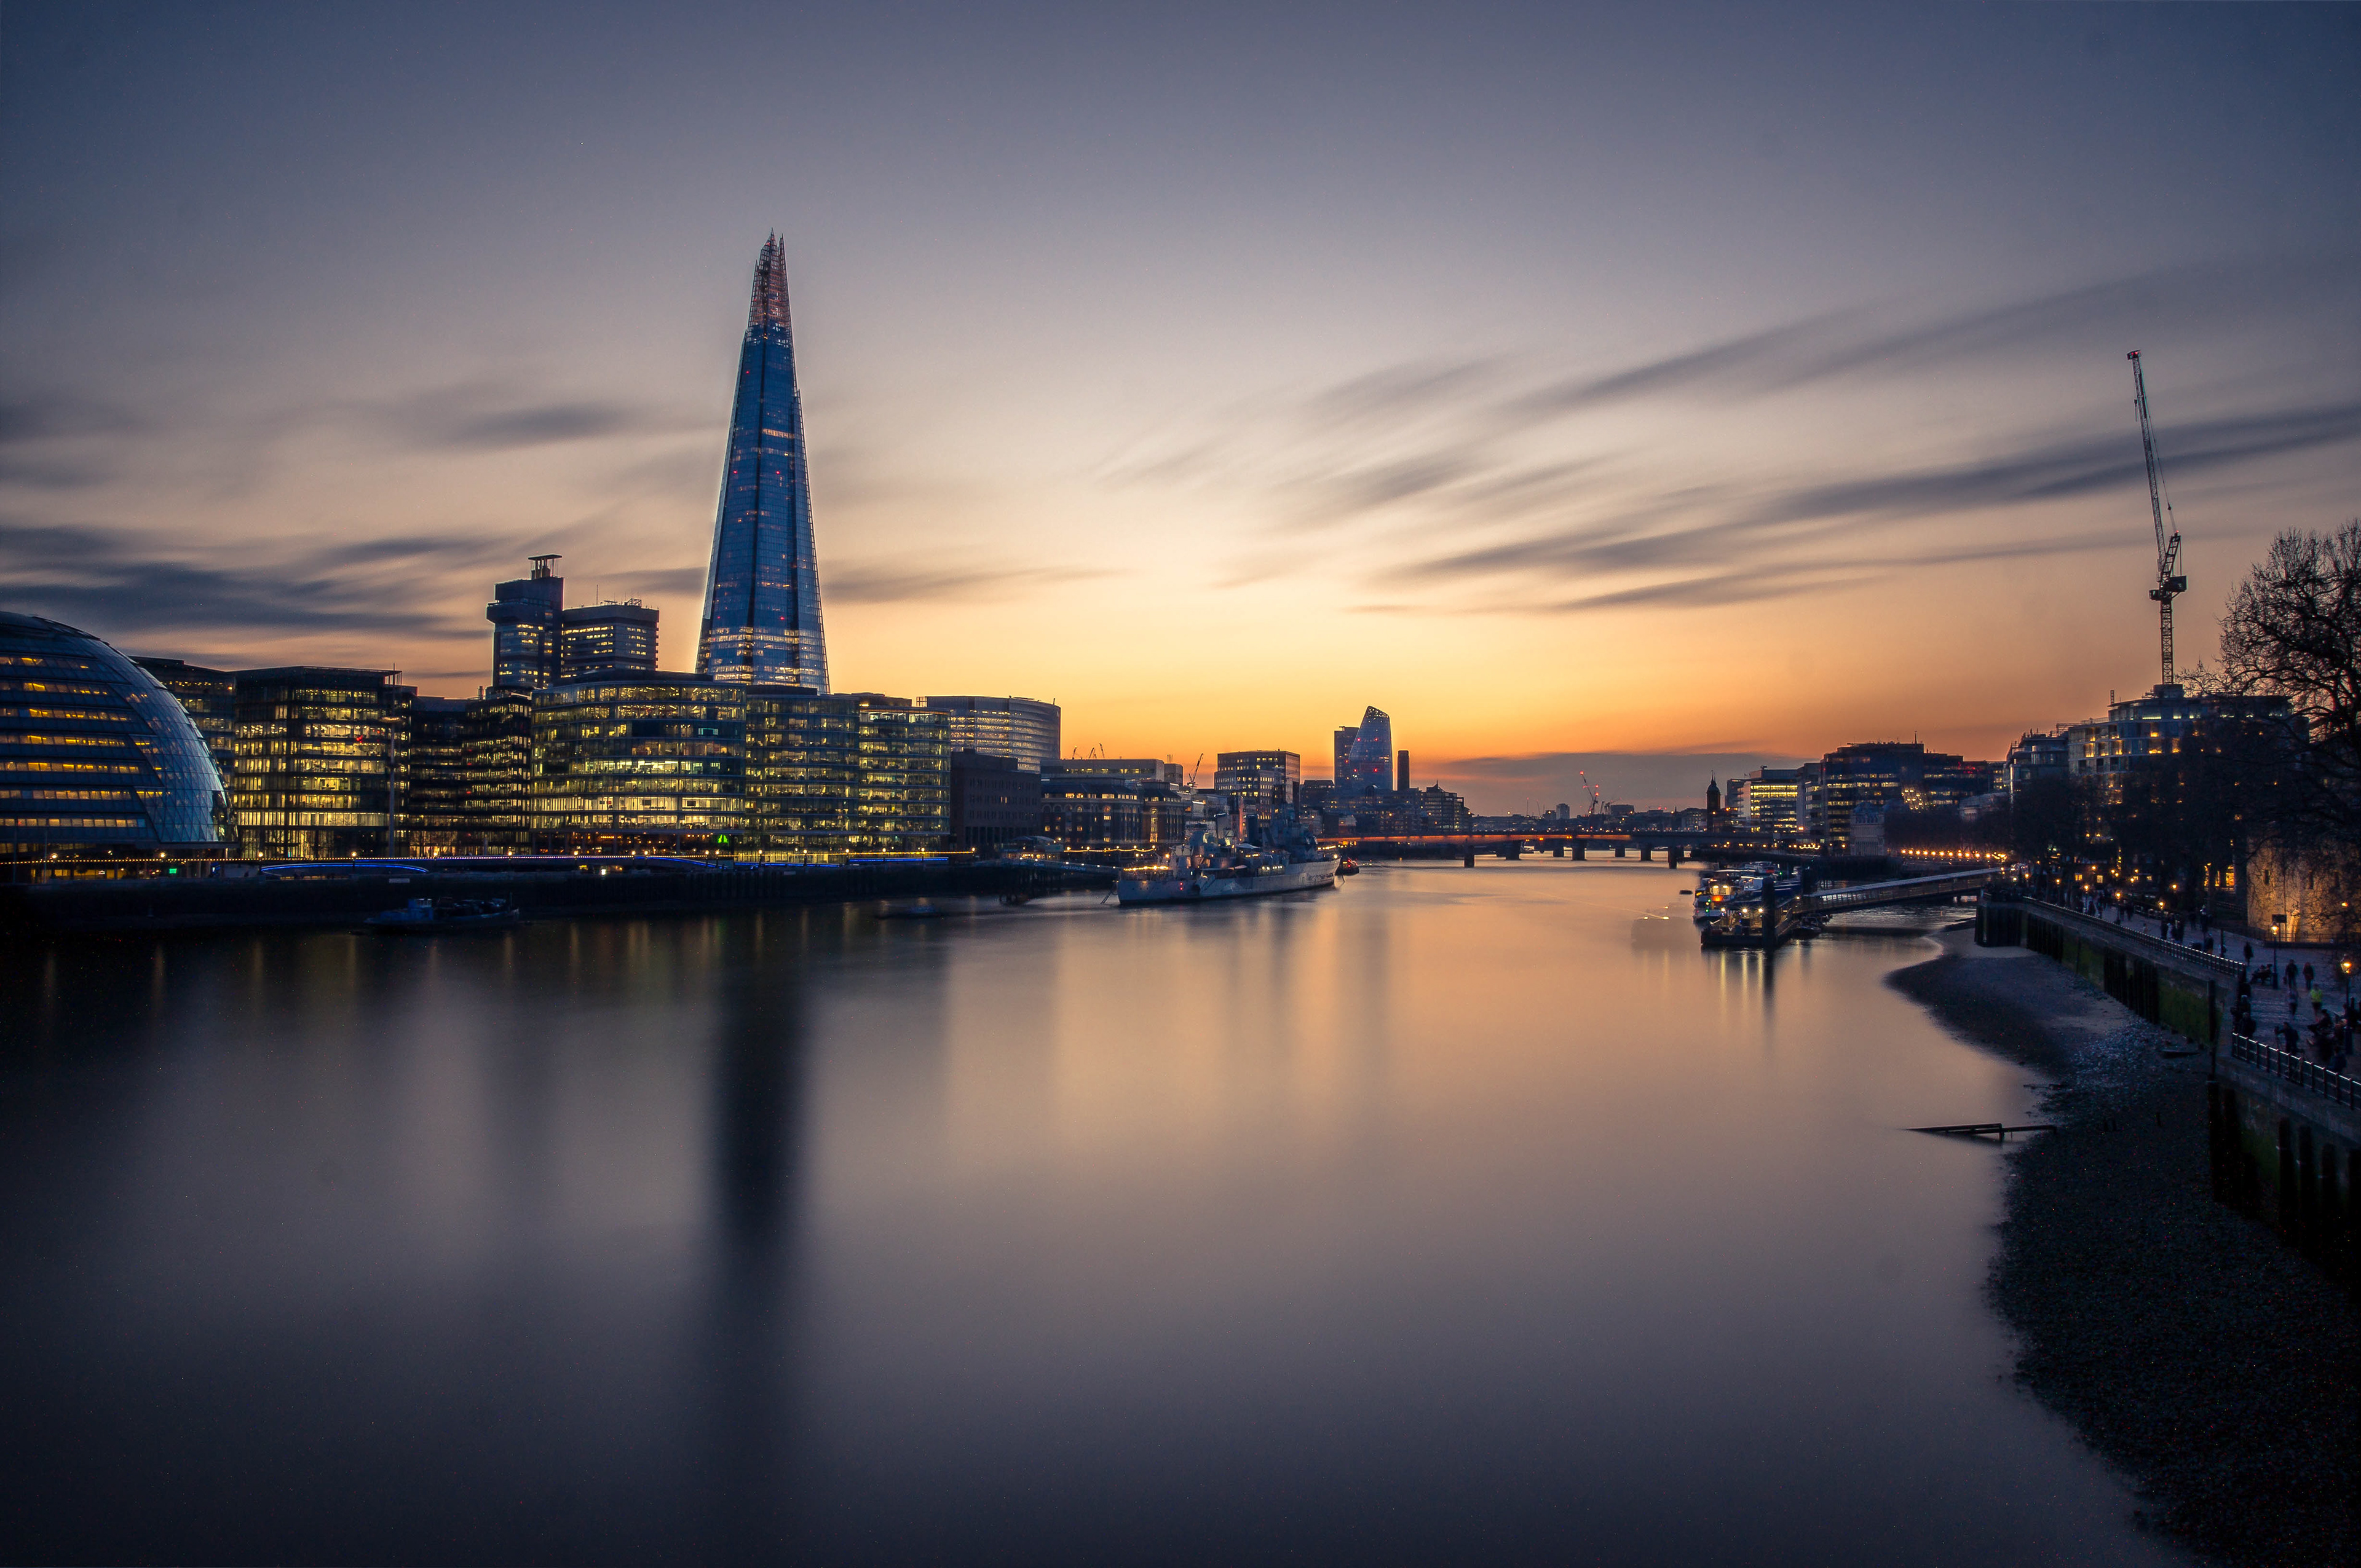
River Thames Sunset, London - - Settings: F11, 1/2 sec, ISO 100 @45mm
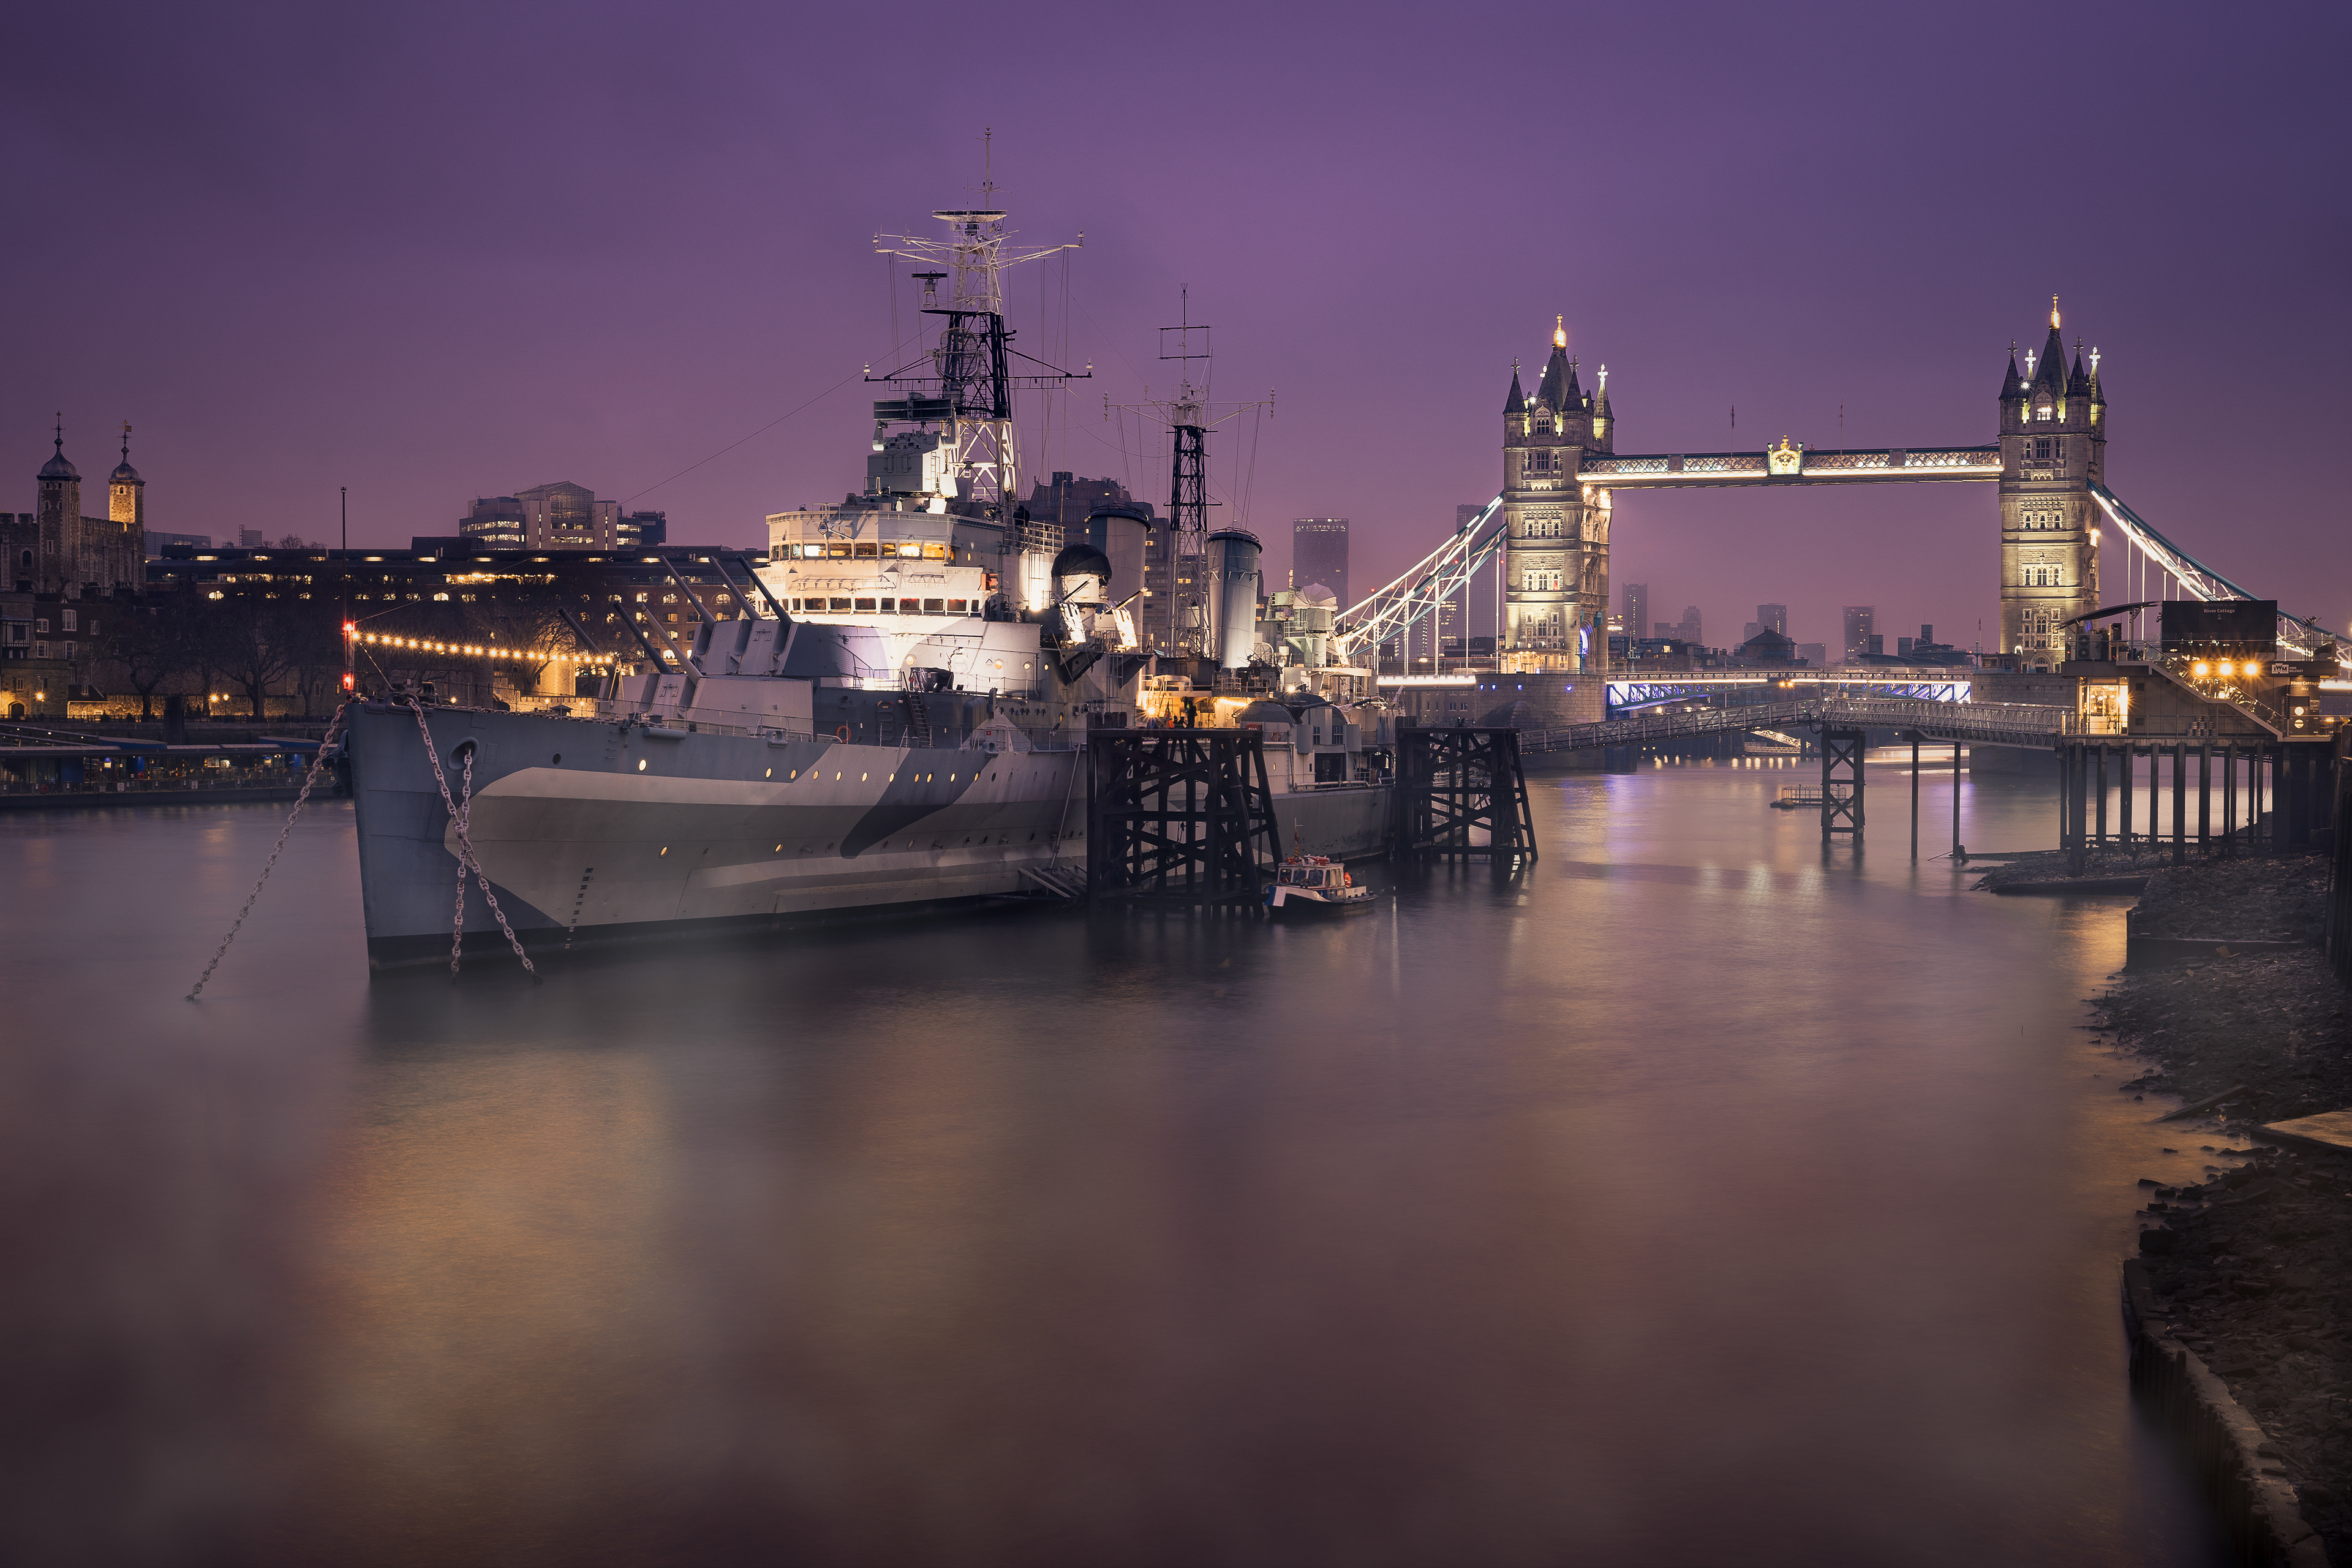
HMS Belfast & Tower Bridge, London - Settings: F11, 10 sec, ISO 100 @57mm
The Foundation of Composition: The Rule of Thirds
Before we explore advanced techniques, let's start with the basics: the Rule of Thirds. Imagine dividing your frame into a 3x3 grid. Place your subject or key elements along the gridlines or at their intersections. This fundamental rule can instantly elevate your cityscape photographs, adding balance and intrigue.
Capturing Leading Lines: Guiding Your Viewer
Leading lines are like visual highways guiding your viewer's gaze through your photograph. Use roads, bridges, or any linear elements within your cityscape to create a dynamic composition. This technique not only adds depth but also tells a story, drawing the viewer into your urban narrative.
Playing with Perspective: Experiment with Angles
Cityscapes offer a playground for experimenting with perspective. Play with different angles and viewpoints to add drama and uniqueness to your compositions. Capture a towering skyscraper from a low angle or shoot from above to showcase the intricate details of a bustling street below. Each angle unveils a new story within the cityscape.
Balance and Symmetry: Aesthetic Harmony
Achieving balance and symmetry can be visually striking. It's not about being perfectly symmetrical, but rather finding harmony within the chaos of the city. Seek out reflections, patterns, and elements that create a symmetrical feel. Your cityscape will exude a sense of order and serenity amidst the urban hustle.
Understanding Light: Golden Hours and More
The right light can make or break your cityscape composition. Golden hours, the magical times just after sunrise and before sunset, offer warm, soft lighting that bathes the city in a mesmerizing glow. Pay attention to how light interacts with the city's structures and experiment with long exposures to capture light trails from moving vehicles, adding a dynamic element to your shots.
I have a great guide on mastering low light photography in this additional more comprehensive guide, please use this link: Mastering Low Light Photography

Dumbo Brooklyn, New York - Settings: F11, 1/5 sec, ISO 100 @24mm
Depth and Layering: Adding Dimension
To make your cityscapes pop, introduce depth and layering. Include foreground elements, such as people, street signs, or trees, to create a sense of depth within your composition. This adds intrigue and helps the viewer connect with the scene on multiple levels.
Embrace Negative Space: Less Is More
In the bustling urban jungle, sometimes less is more. Embrace negative space to draw attention to your subject and evoke a sense of calm. This technique can also enhance the minimalistic beauty of a cityscape, allowing the viewer to appreciate the simplicity amidst the complexity.
Capturing the Essence: Emotions and Stories
Cityscapes aren't just about architecture; they're about the people, emotions, and stories that unfold within the city's bounds. Capture candid moments, street scenes, and the hustle and bustle of urban life. These images convey the soul of the city, providing a unique perspective on cityscape photography.
Remember to...
- Be respectful to passers-by who are going about their day-to-day business.
- Be careful around cities with expensive camera gear, make sure you stay safe, stay in safe areas where you can and try to blend in as much as possible.
- Do you research on specific areas, for example Canary Wharf is all private land and you can be surrounded by private security before you know it!
- Think outside the box, get the typical shot but also challenge yourself to get new perspectives on what are very familiar over photographed locations.
- And if I haven’t mentioned it before, plan!
Post Shoot
Lightroom is my go-to for image catalogue and selection. I usually upload and catalogue and leave it for a few days to look at the images with fresh eyes. I flick through the images in Lightroom and flag the images I like with colour markers, red being my favourites, blue being 'okays' and the rest being the non-keepers (which I delete).
My favourite’s images, which I highlighted in red in Lightroom, I take from the base unedited RAW images and process in Photoshop applying more localised changes and corrections. I will spend significant time on these images in editing to bring them up to club/external competition standard and to a place where I am happy to post on this website. I also like to find similar City Scape images and edit them in a similar style, so they sit nicely together in a collection.
Ending Comments.
In conclusion, cityscape photography composition is a delicate dance between rules, creativity, and storytelling. Mastering these techniques will help you create visually appealing cityscape images that captivate and resonate with your audience. Remember, practice and experimentation are your best allies on this exciting photographic journey. So, grab your camera, hit the streets, and let your cityscape compositions tell the unique stories of the urban landscapes you encounter.
I'm hoping this blog article has inspired you to have a go at this fantastic genre of photography. It brings many challenges that help you develop essential skills that can be applied across and into other areas of photography. I'm hoping to continue this project and develop myself further with this style of photography, so please keep an eye out for future planned shoots and Blog posts on this website.
If you have any questions or have any ideas/ tips to share, please feel free to contact me using the 'contact' methods provided on the website panel.
Thank you, stay safe and happy shooting!
Martin
Want to learn more?
This topic and guide is very closely linked to my other guides, please check them out:
Want to see more images like this?
Looking for further advice and inspiration, head over to:
Like what you see and want any of my images as a print up to A3, please contact me?
If you have any questions, comments or feedback please reach out to me using the submission form below. I know these guides have been greatly received by many and I'm always happy to help out where I can.
Thank you!