How to Photograph MMA Events
Photographing MMA events presents unique challenges and opportunities for capturing high-energy moments and raw emotions. This comprehensive guide will cover essential tips and techniques to help you capture stunning images of MMA fights, ensuring your shots are as powerful as the action in the cage.
The Cage-Side Advantage
Securing a cage-side position is essential for capturing the best shots. This proximity allows you to immerse yourself in the action and capture the intensity and energy of the fights. Establish connections with local MMA gyms, promoters, and event organisers to gain access. Networking is key, as building relationships can provide you with opportunities to get closer to the action.
Gear Up: Your Camera Arsenal
For MMA photography, having the right gear is crucial. I pack my Sony A7III and Sigma Art 2.8 24-70mm. The 24-70mm is used for 90% of my boxing and MMA photography, covering most focal lengths needed ringside. The wider lens is for venue shots or close-ups, and the longer lens for shooting from other vantage points. Also, pack plenty of batteries and memory cards—boxing events can result in thousands of images. A neck strap is also essential for safety.
Additionally, consider carrying a monopod to stabilise your shots, especially during long events. Lens hoods can also be beneficial in managing lens flare from harsh lighting.
On Location
Arrive early to get acquainted with the venue and its lighting conditions. Introduce yourself to the fighters, coaches, and event staff. Testing your equipment and adjusting your settings according to the environment will ensure you’re ready to shoot when the action starts. Practising different shooting points around the venue is crucial to understanding technical challenges and vantage points.
Take note of the event schedule and plan your shooting positions accordingly. Understanding the sequence of fights can help you anticipate key moments and positioning.
Camera Settings That Pack a Punch
To capture lightning-fast punches and the sweat on fighters' brows, the right camera settings are paramount. Set a high shutter speed to freeze the action (1/500 to 1/800). Adjust your ISO to cope with the often challenging lighting conditions (capped at 12,800), and fine-tune your aperture (f/4) for the right depth of field. I use manual mode, burst mode (high rate), and continuous focus. Experiment with exposure compensation and focus points to get sharp, well-exposed shots.
Using the camera's tracking autofocus mode can help maintain focus on the fighters even as they move rapidly. Shooting in RAW format is advisable for greater flexibility in post-processing.
Mastering the Cage
Understanding the layout of the cage is crucial. Different positions offer various angles and perspectives. Move around the cage to find the best vantage points, and be prepared to shoot through the cage mesh to get unobstructed views of the fighters. Using a wide aperture can help blur the mesh, making it less intrusive in your photos.
Consider the height of the cage and the position of the lights when choosing your shooting spots. Sometimes, shooting from a slightly elevated position can give you a clearer view of the action without obstruction.
The 2 images below show a typical cage set-up with a nicely placed platform to stand on and shoot down into the cage.
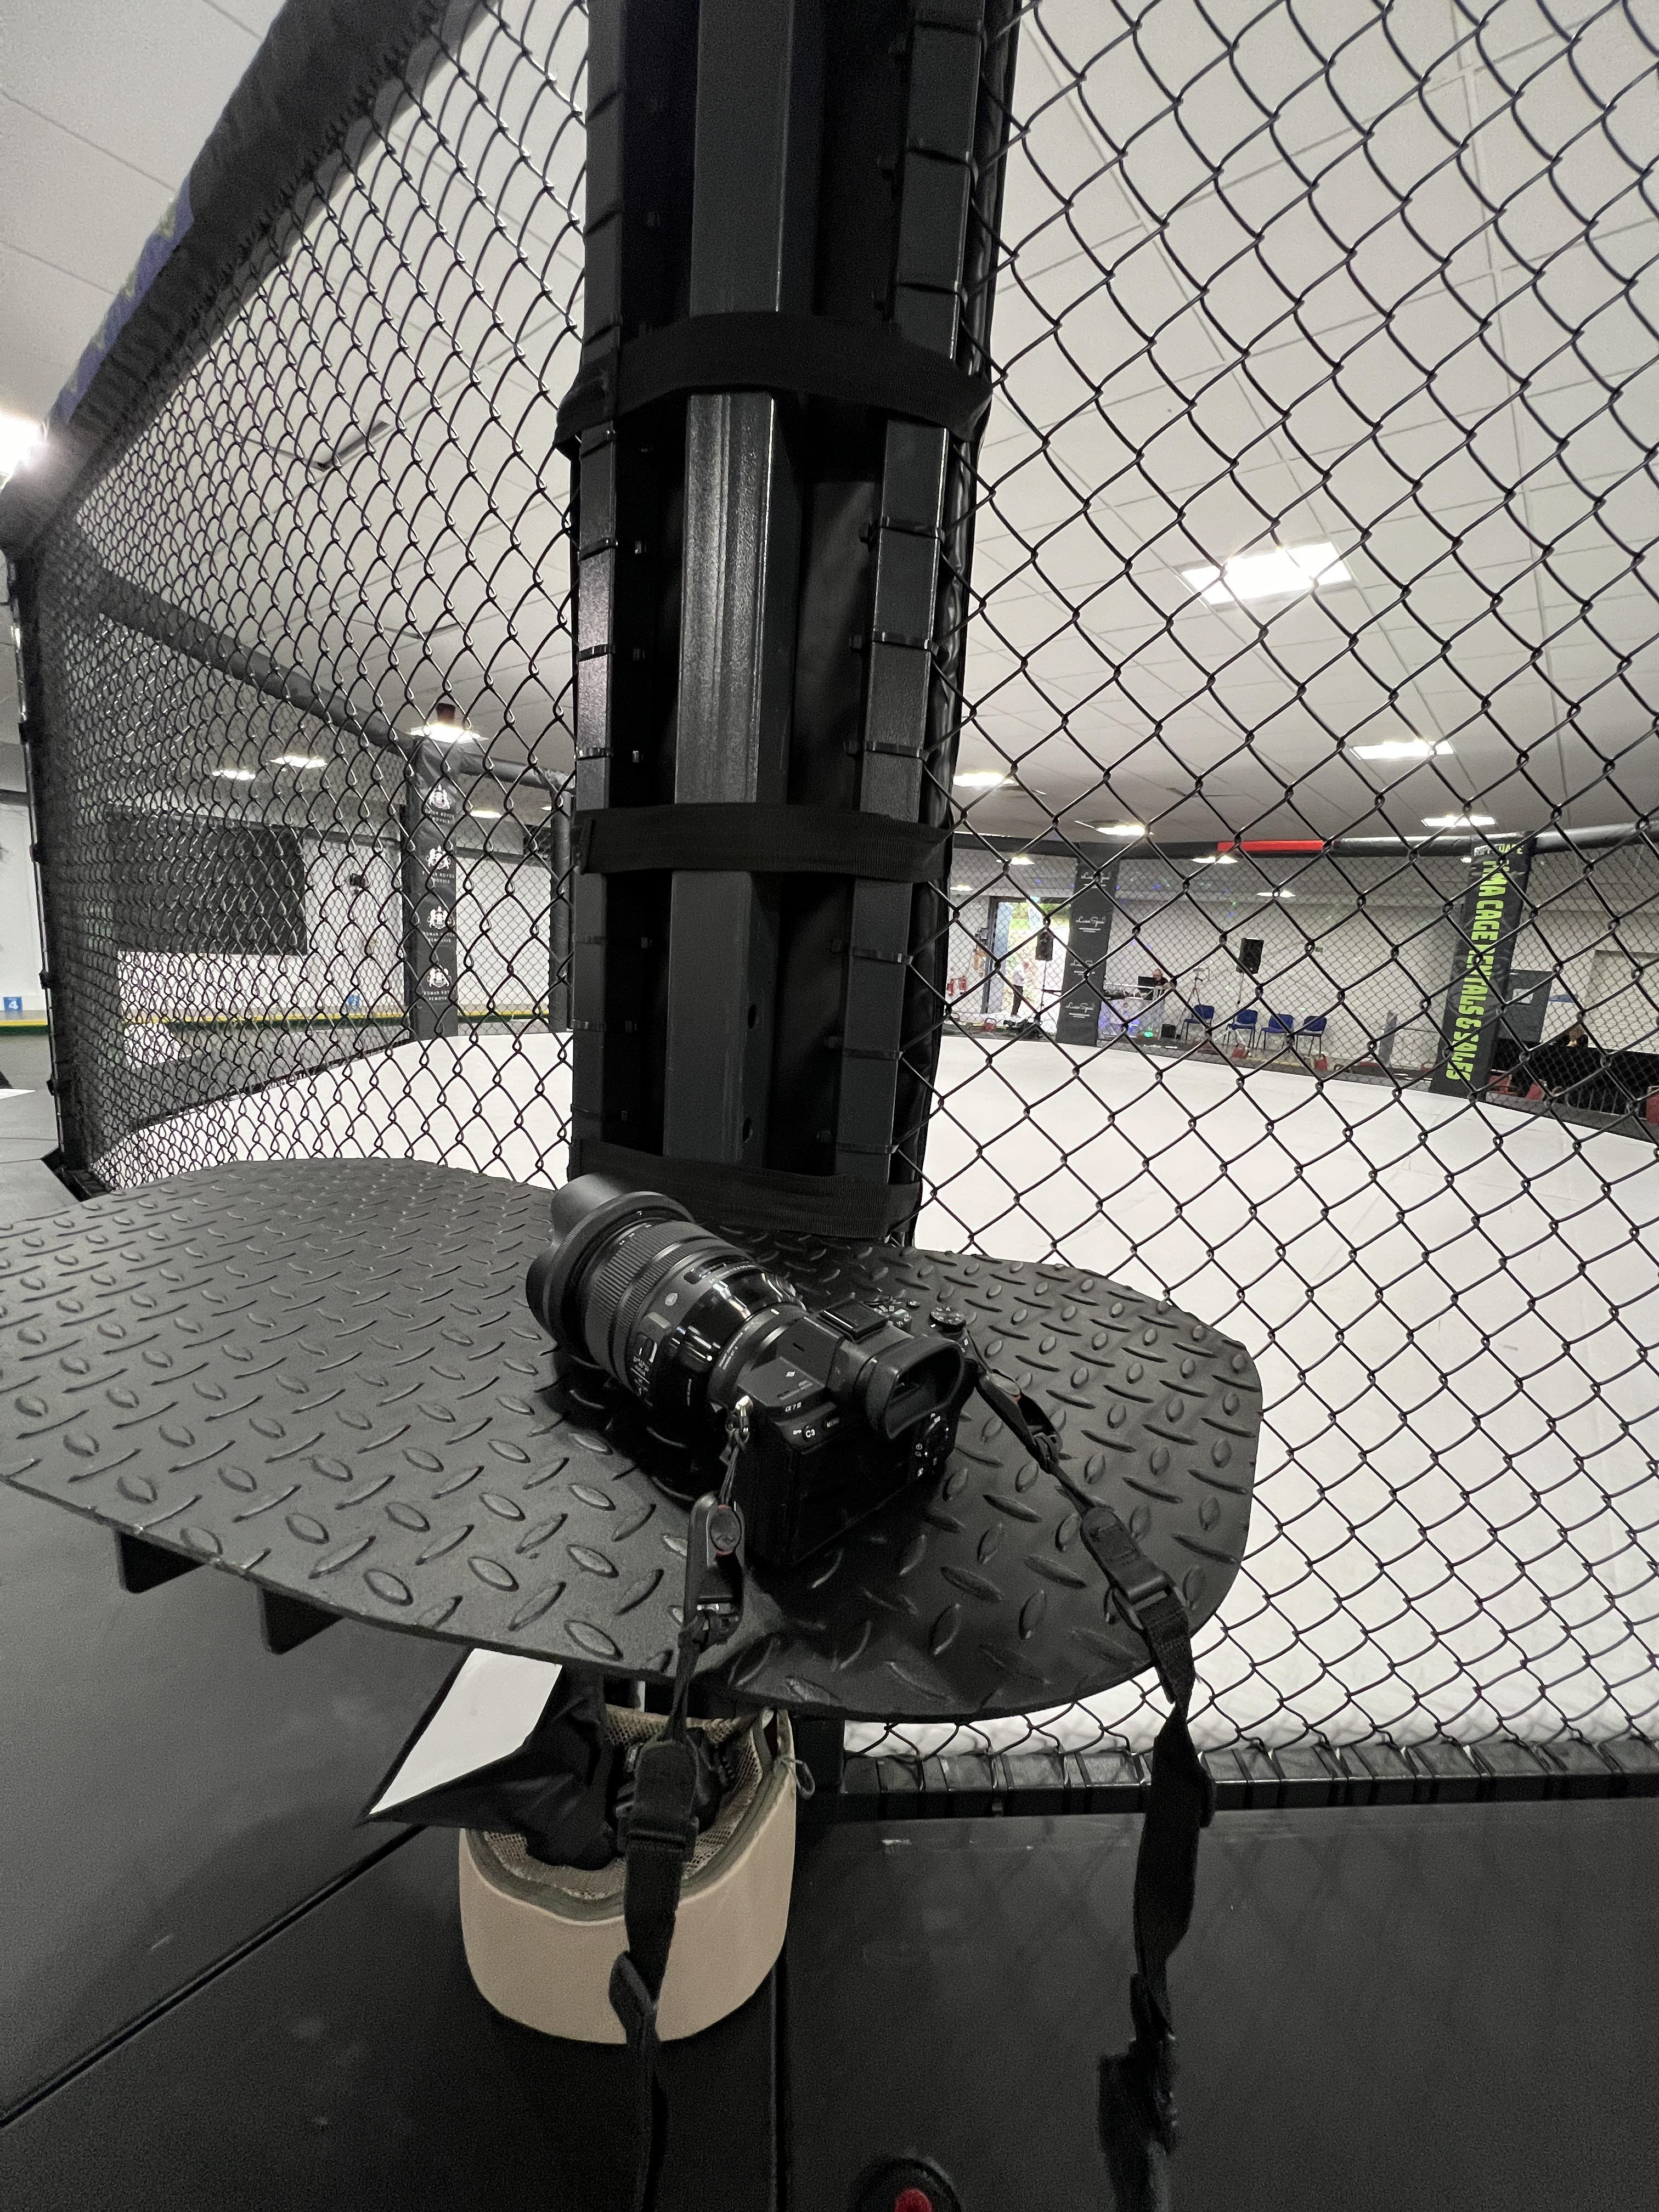
The MMA Cage Step Plate and my trusty Sony A7iii and Sigma 24-70mm ready to go
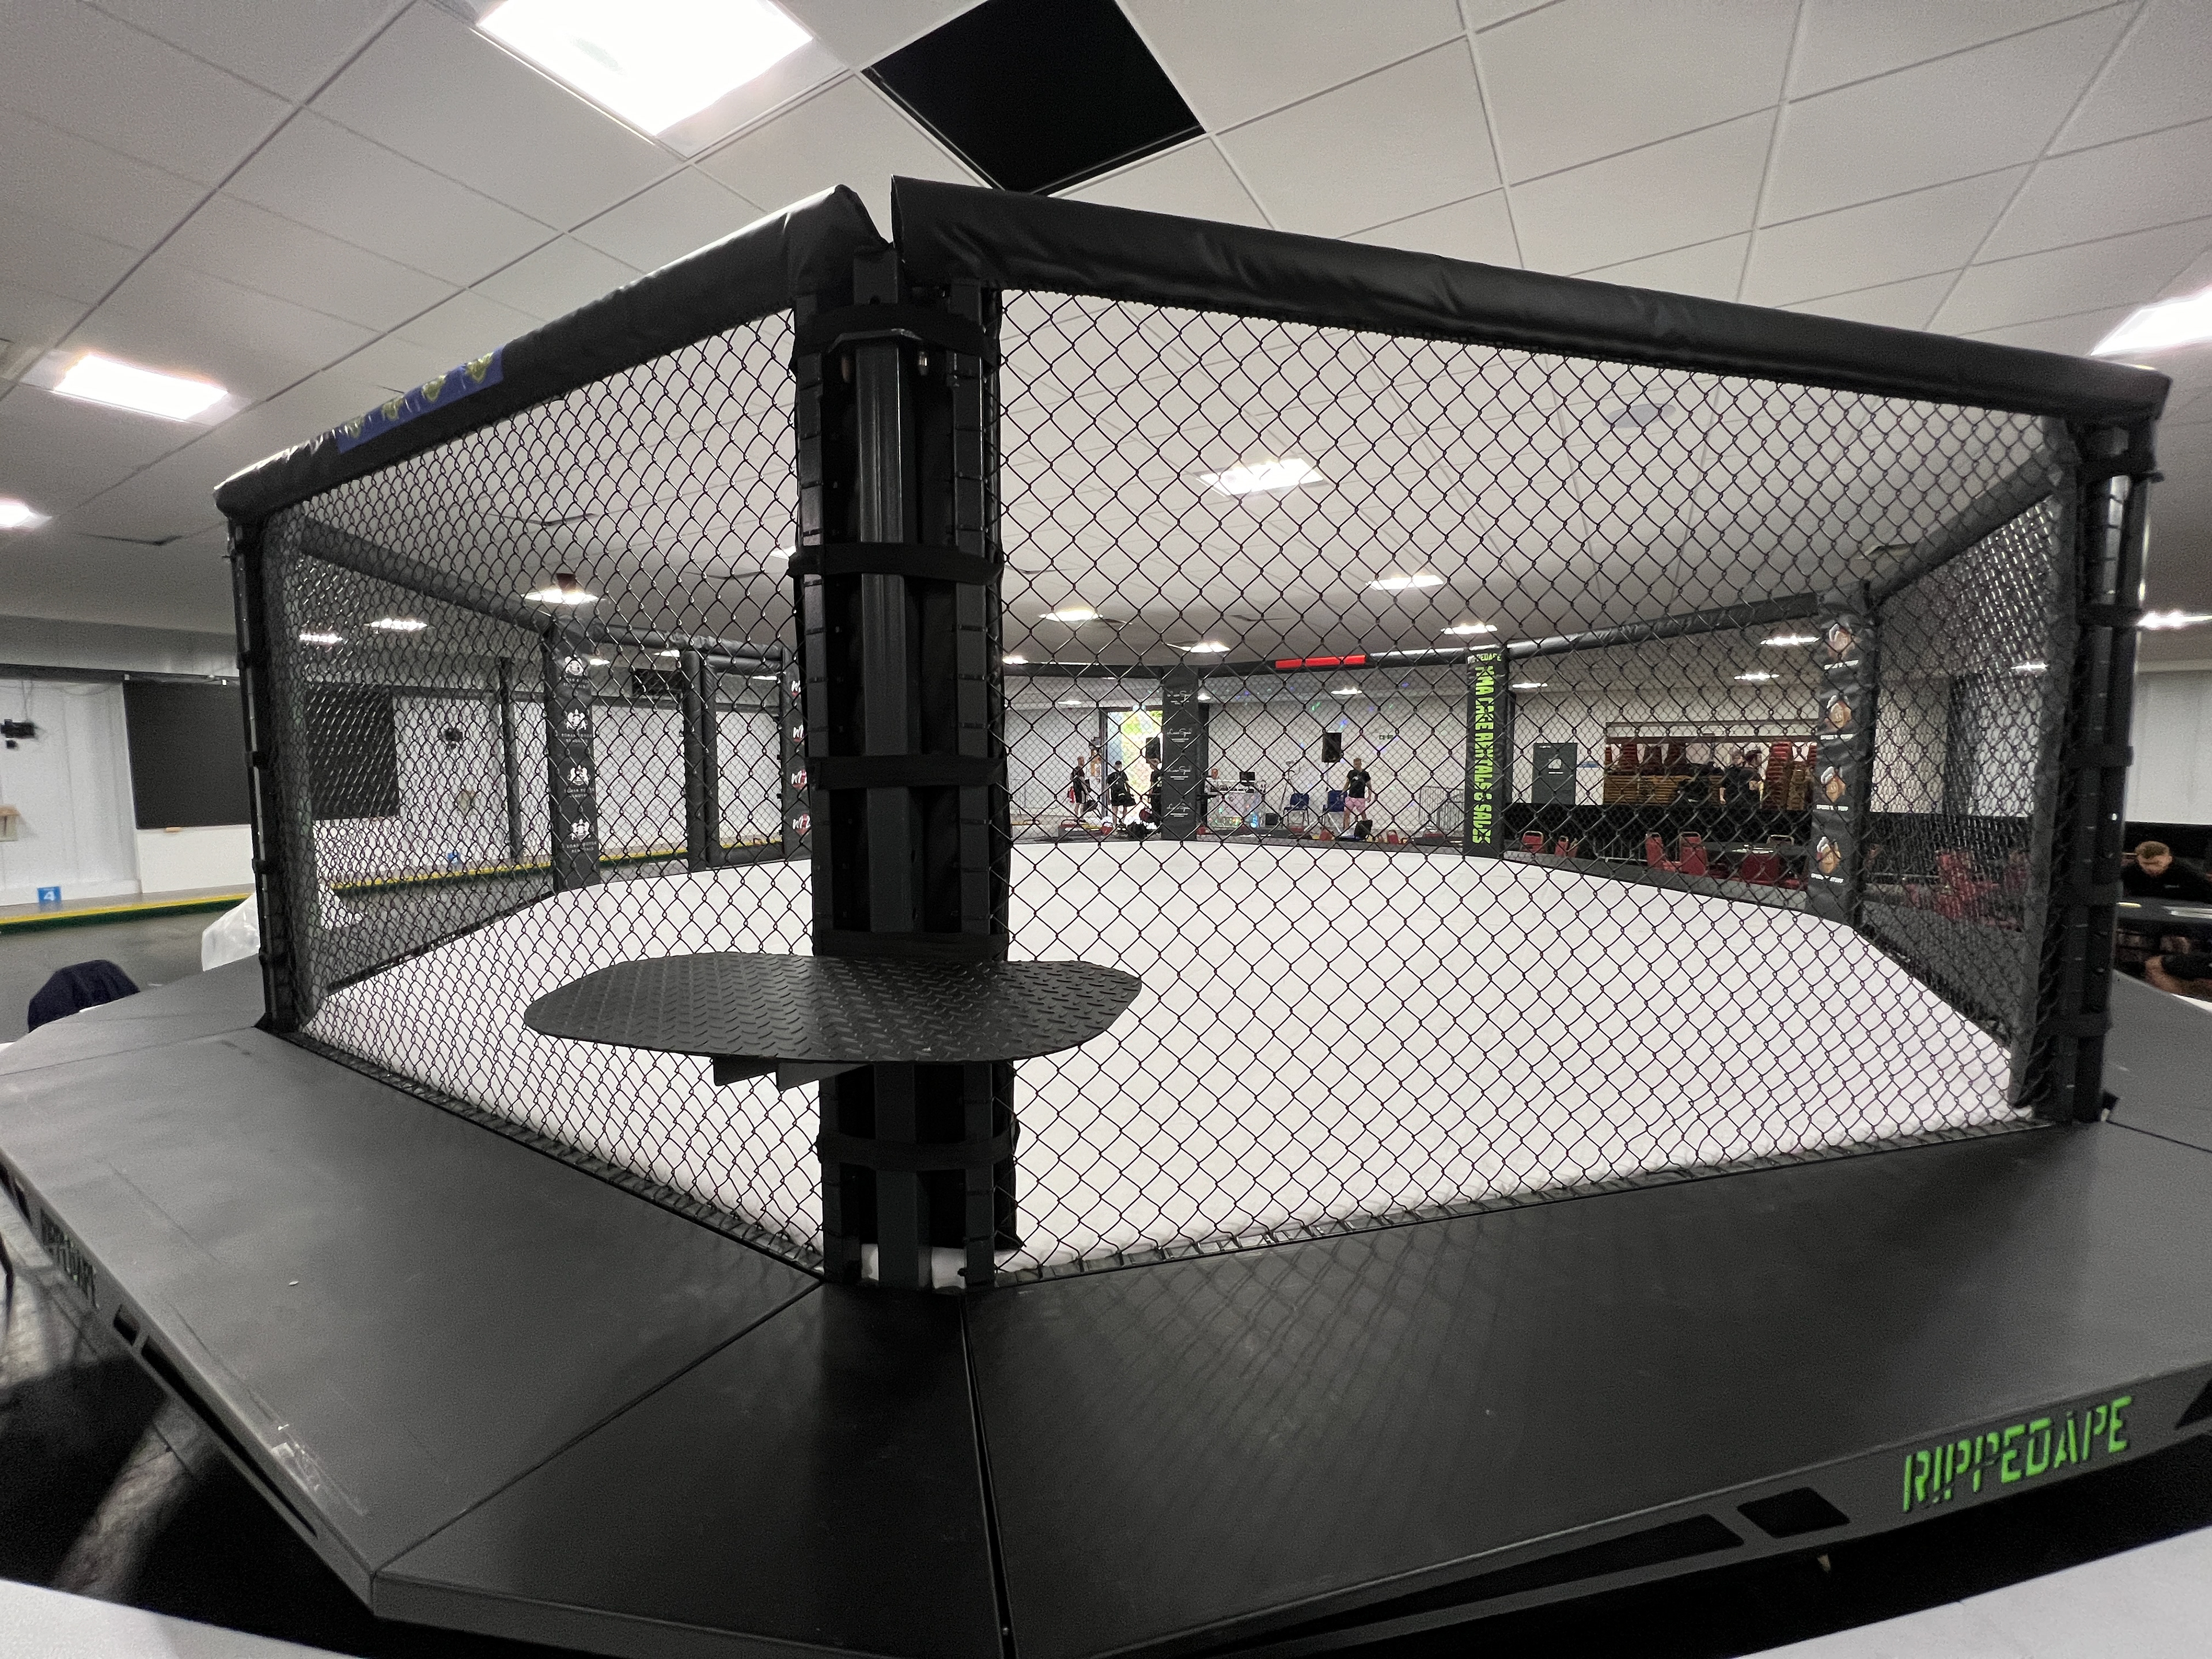
A typical MMA cage fight photography set up with step plate
Timing is Everything
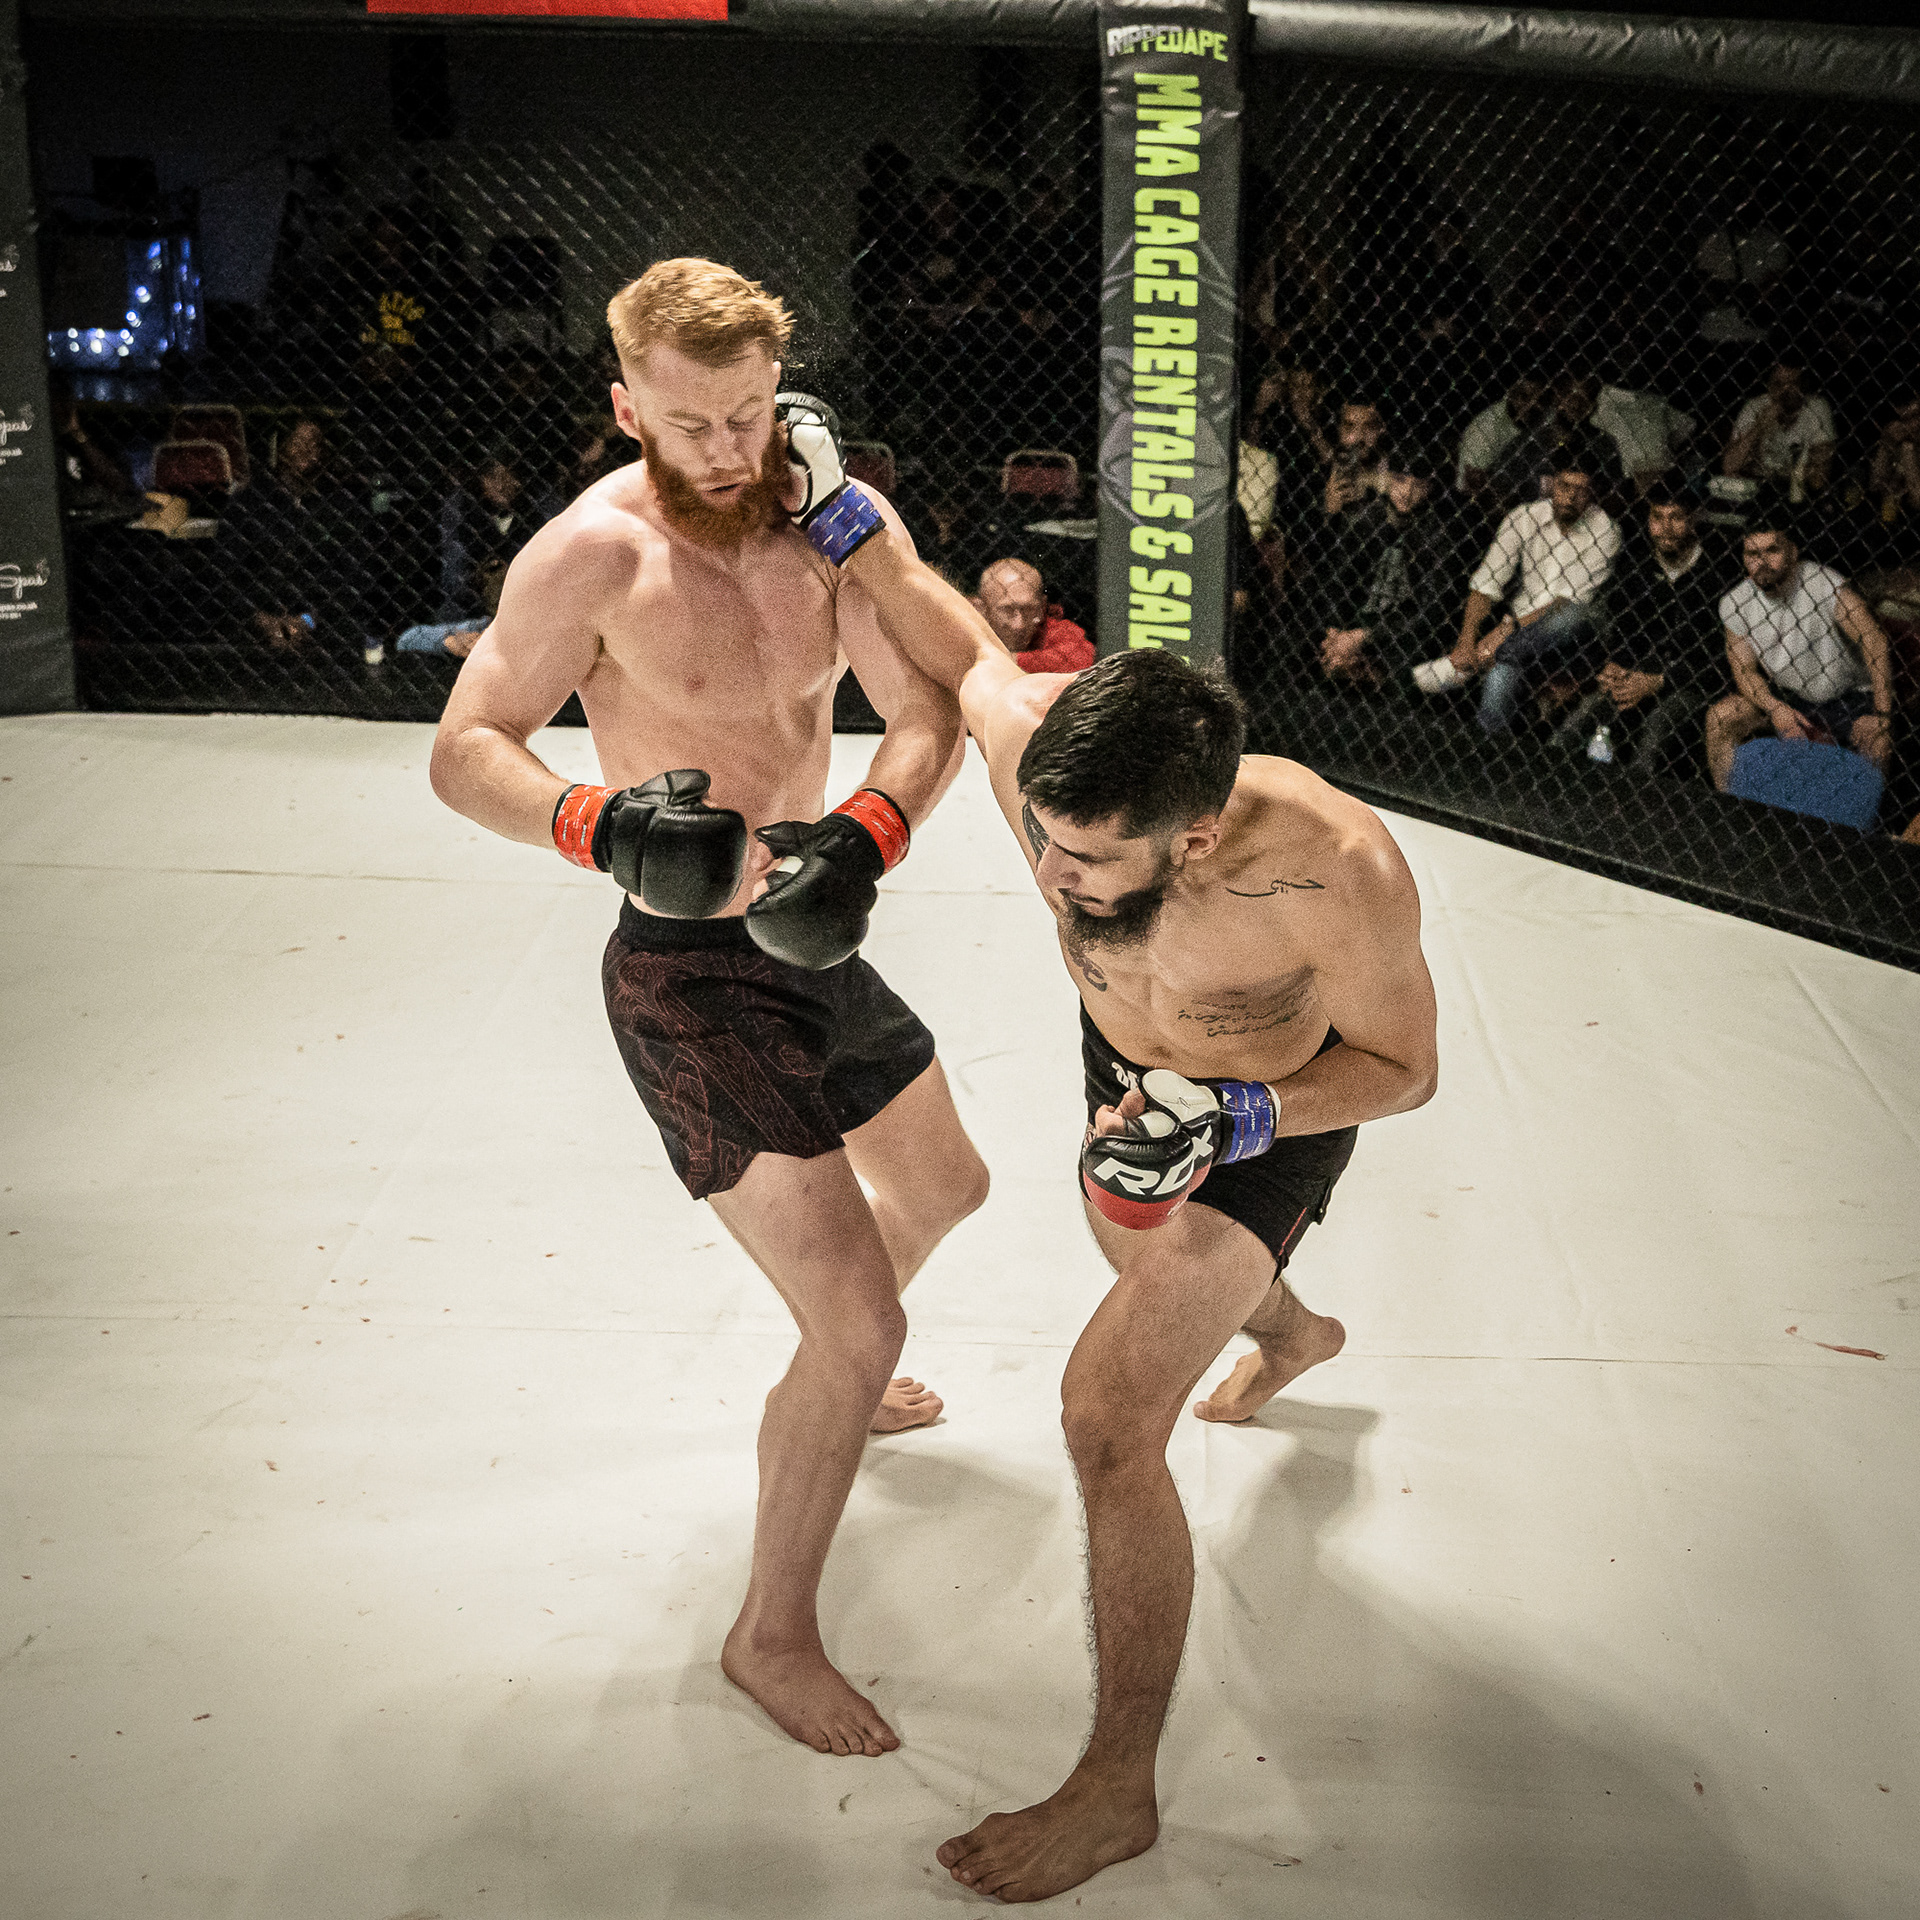
Anticipate the fighters’ movements and reactions. Capturing the build-up, strikes, and emotional highs and lows is essential. Shoot continuously during key moments to ensure you don’t miss the perfect shot. Familiarise yourself with the sport and fighters to predict critical moments more accurately. Move around the ringside to follow the action and get varied shots.
Listening to the sounds of the fight can also provide cues for pivotal moments, such as a loud impact indicating a significant strike.
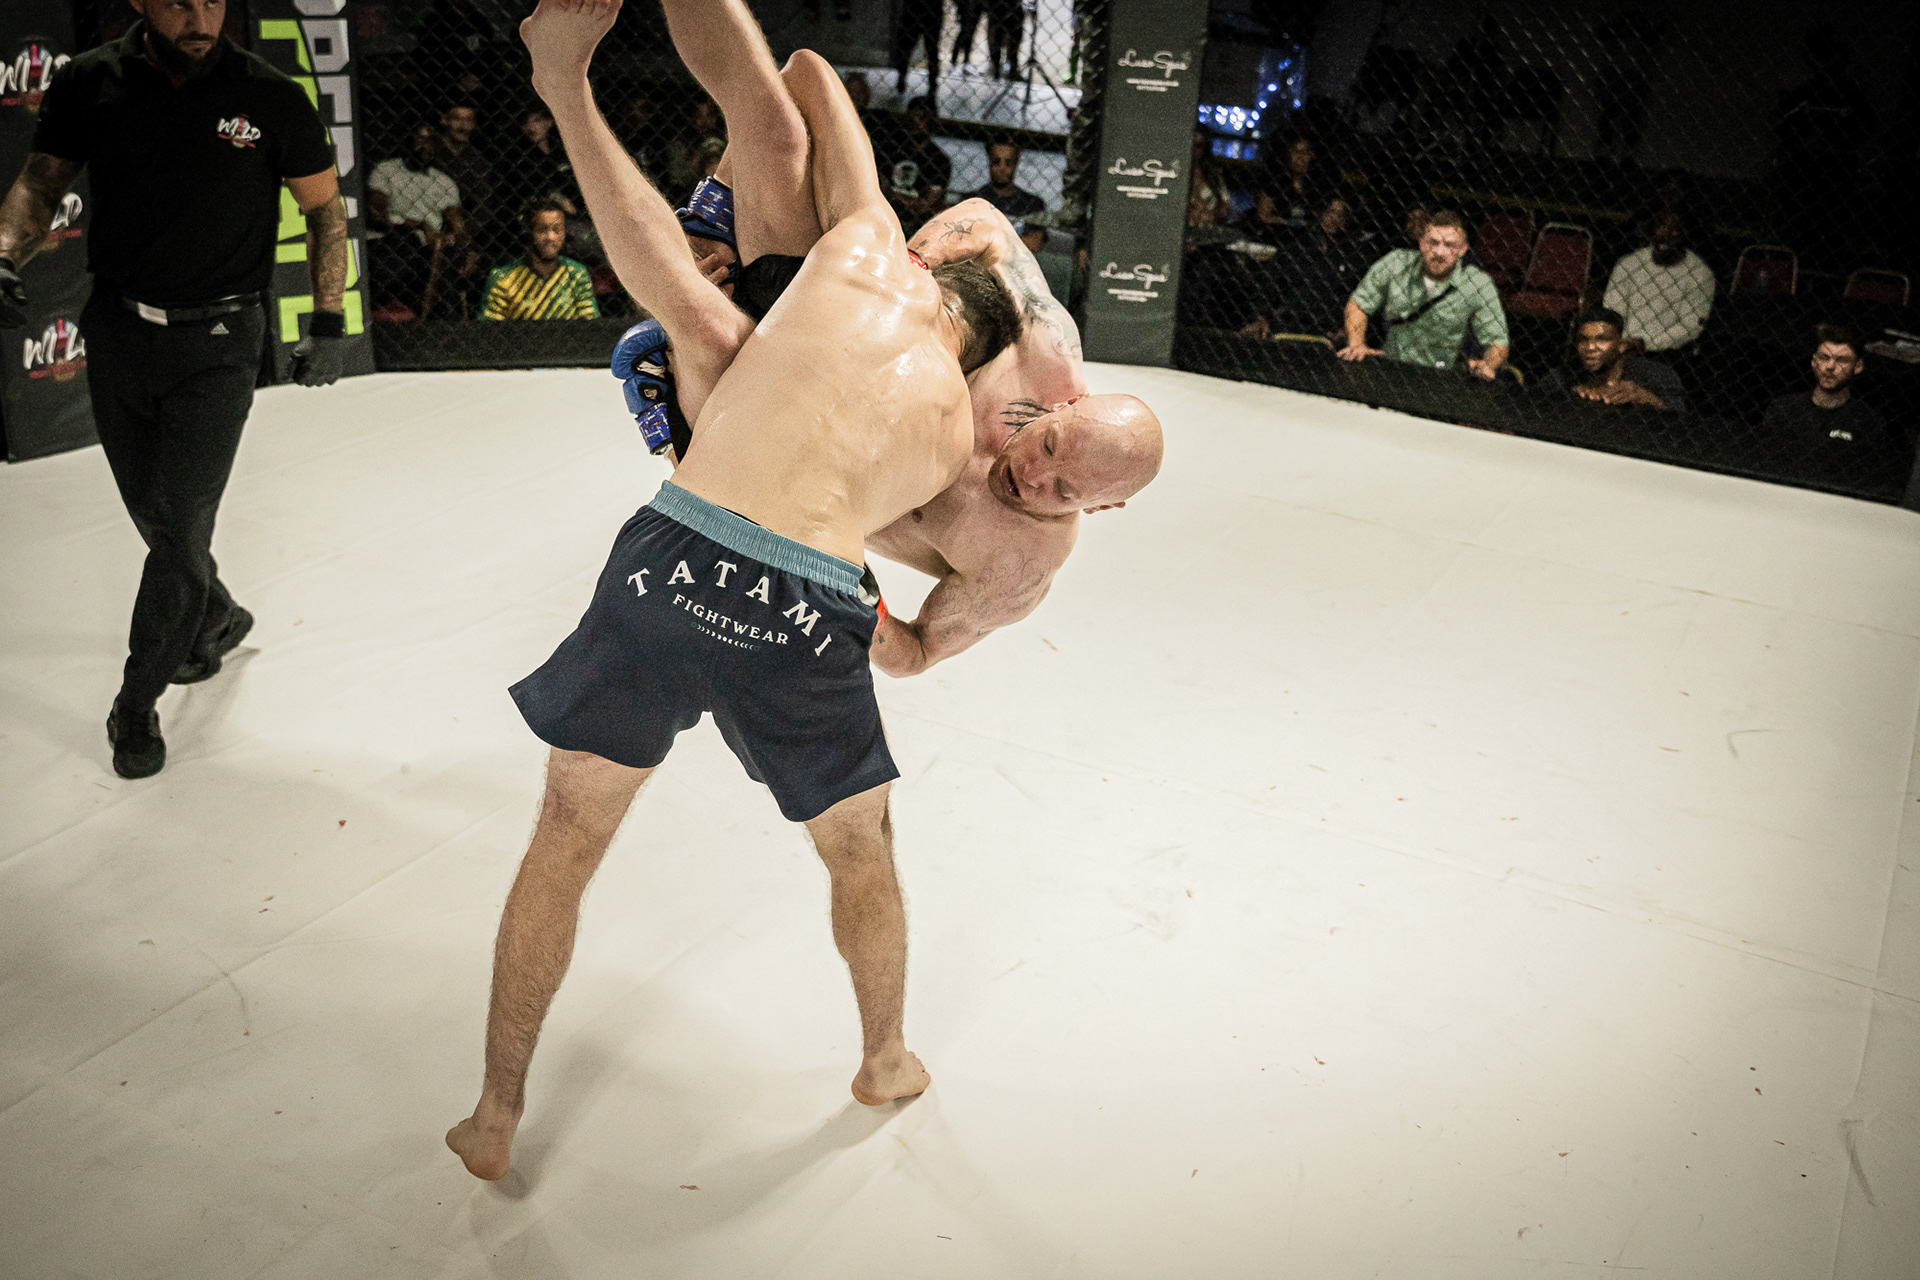
F4.0, 1/800 sec, ISO 2,000 @38mm
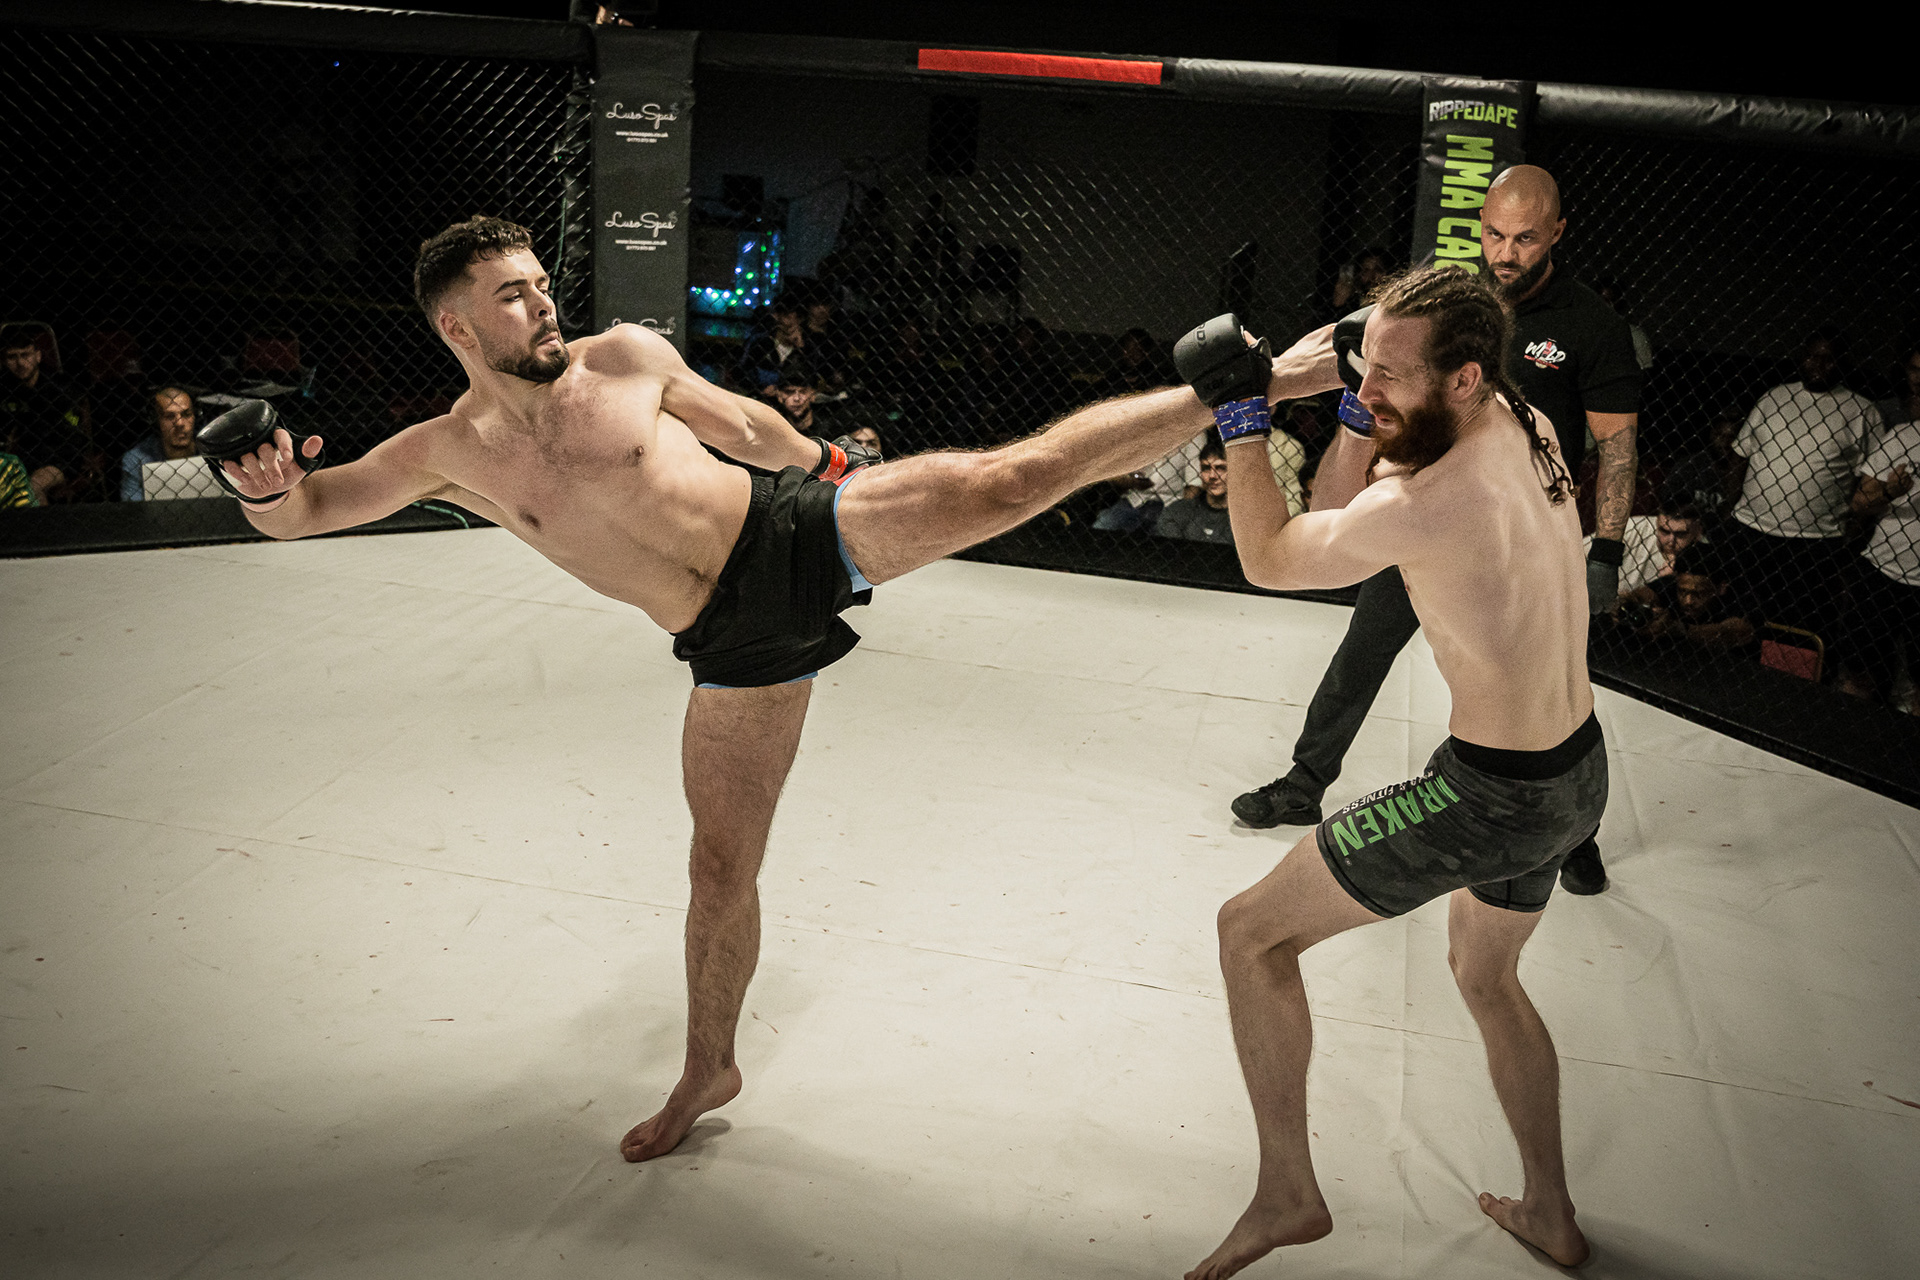
F4.0, 1/800 sec, ISO 2,000 @38mm
Conquering Cage Lighting
Cage lighting can be challenging with harsh spotlights and shadows. Use the lighting to your advantage by positioning yourself where the light is most even. Adjust your settings to cope with changes in lighting throughout the event. Utilise the light to create dramatic effects, highlighting the fighters and enhancing the atmosphere.
Experiment with white balance settings to ensure accurate colour representation. Custom white balance can be particularly useful in venues with mixed lighting.
I have a great guide on mastering low light photography in this additional more comprehensive guide, please use this link: Mastering Low Light Photography
Focus on the Fight and Compose Like a Pro
Use your camera’s autofocus system to keep the fighters in sharp focus. Compose your shots creatively, using the rule of thirds, leading lines, and the golden ratio. Capture the fighters’ emotions, the intensity of the fight, and the atmosphere of the event. Experiment with different angles and perspectives to add variety to your shots.
Incorporate elements of the environment, such as the crowd's reaction or the corner team's intensity, to add context and depth to your images.
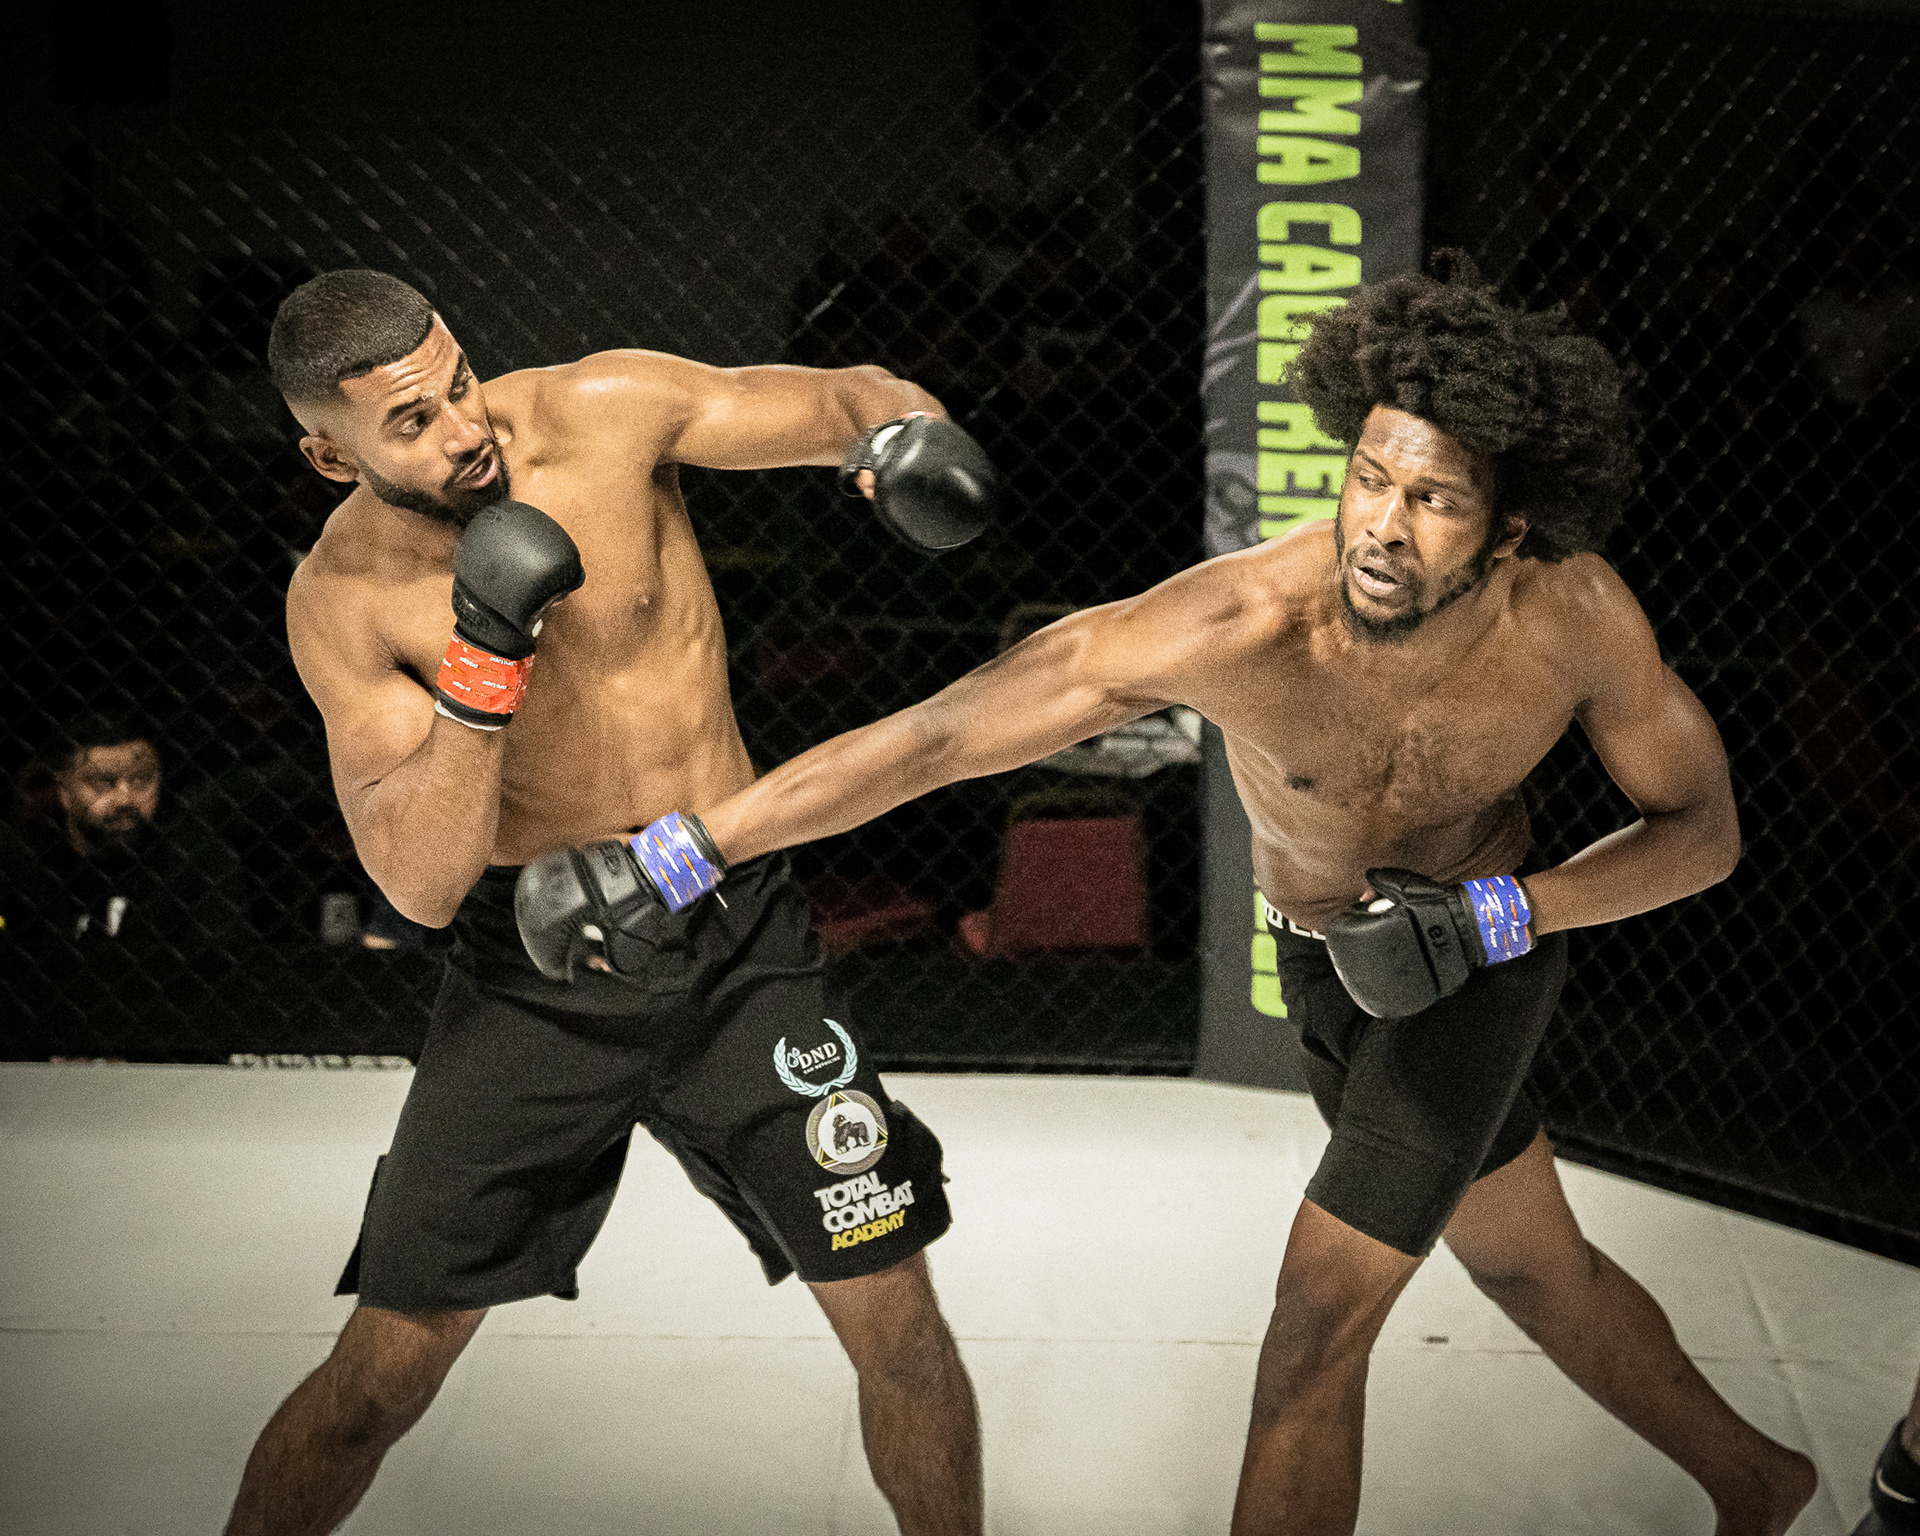
F4.0, 1/800 sec, ISO 6,400 @70mm
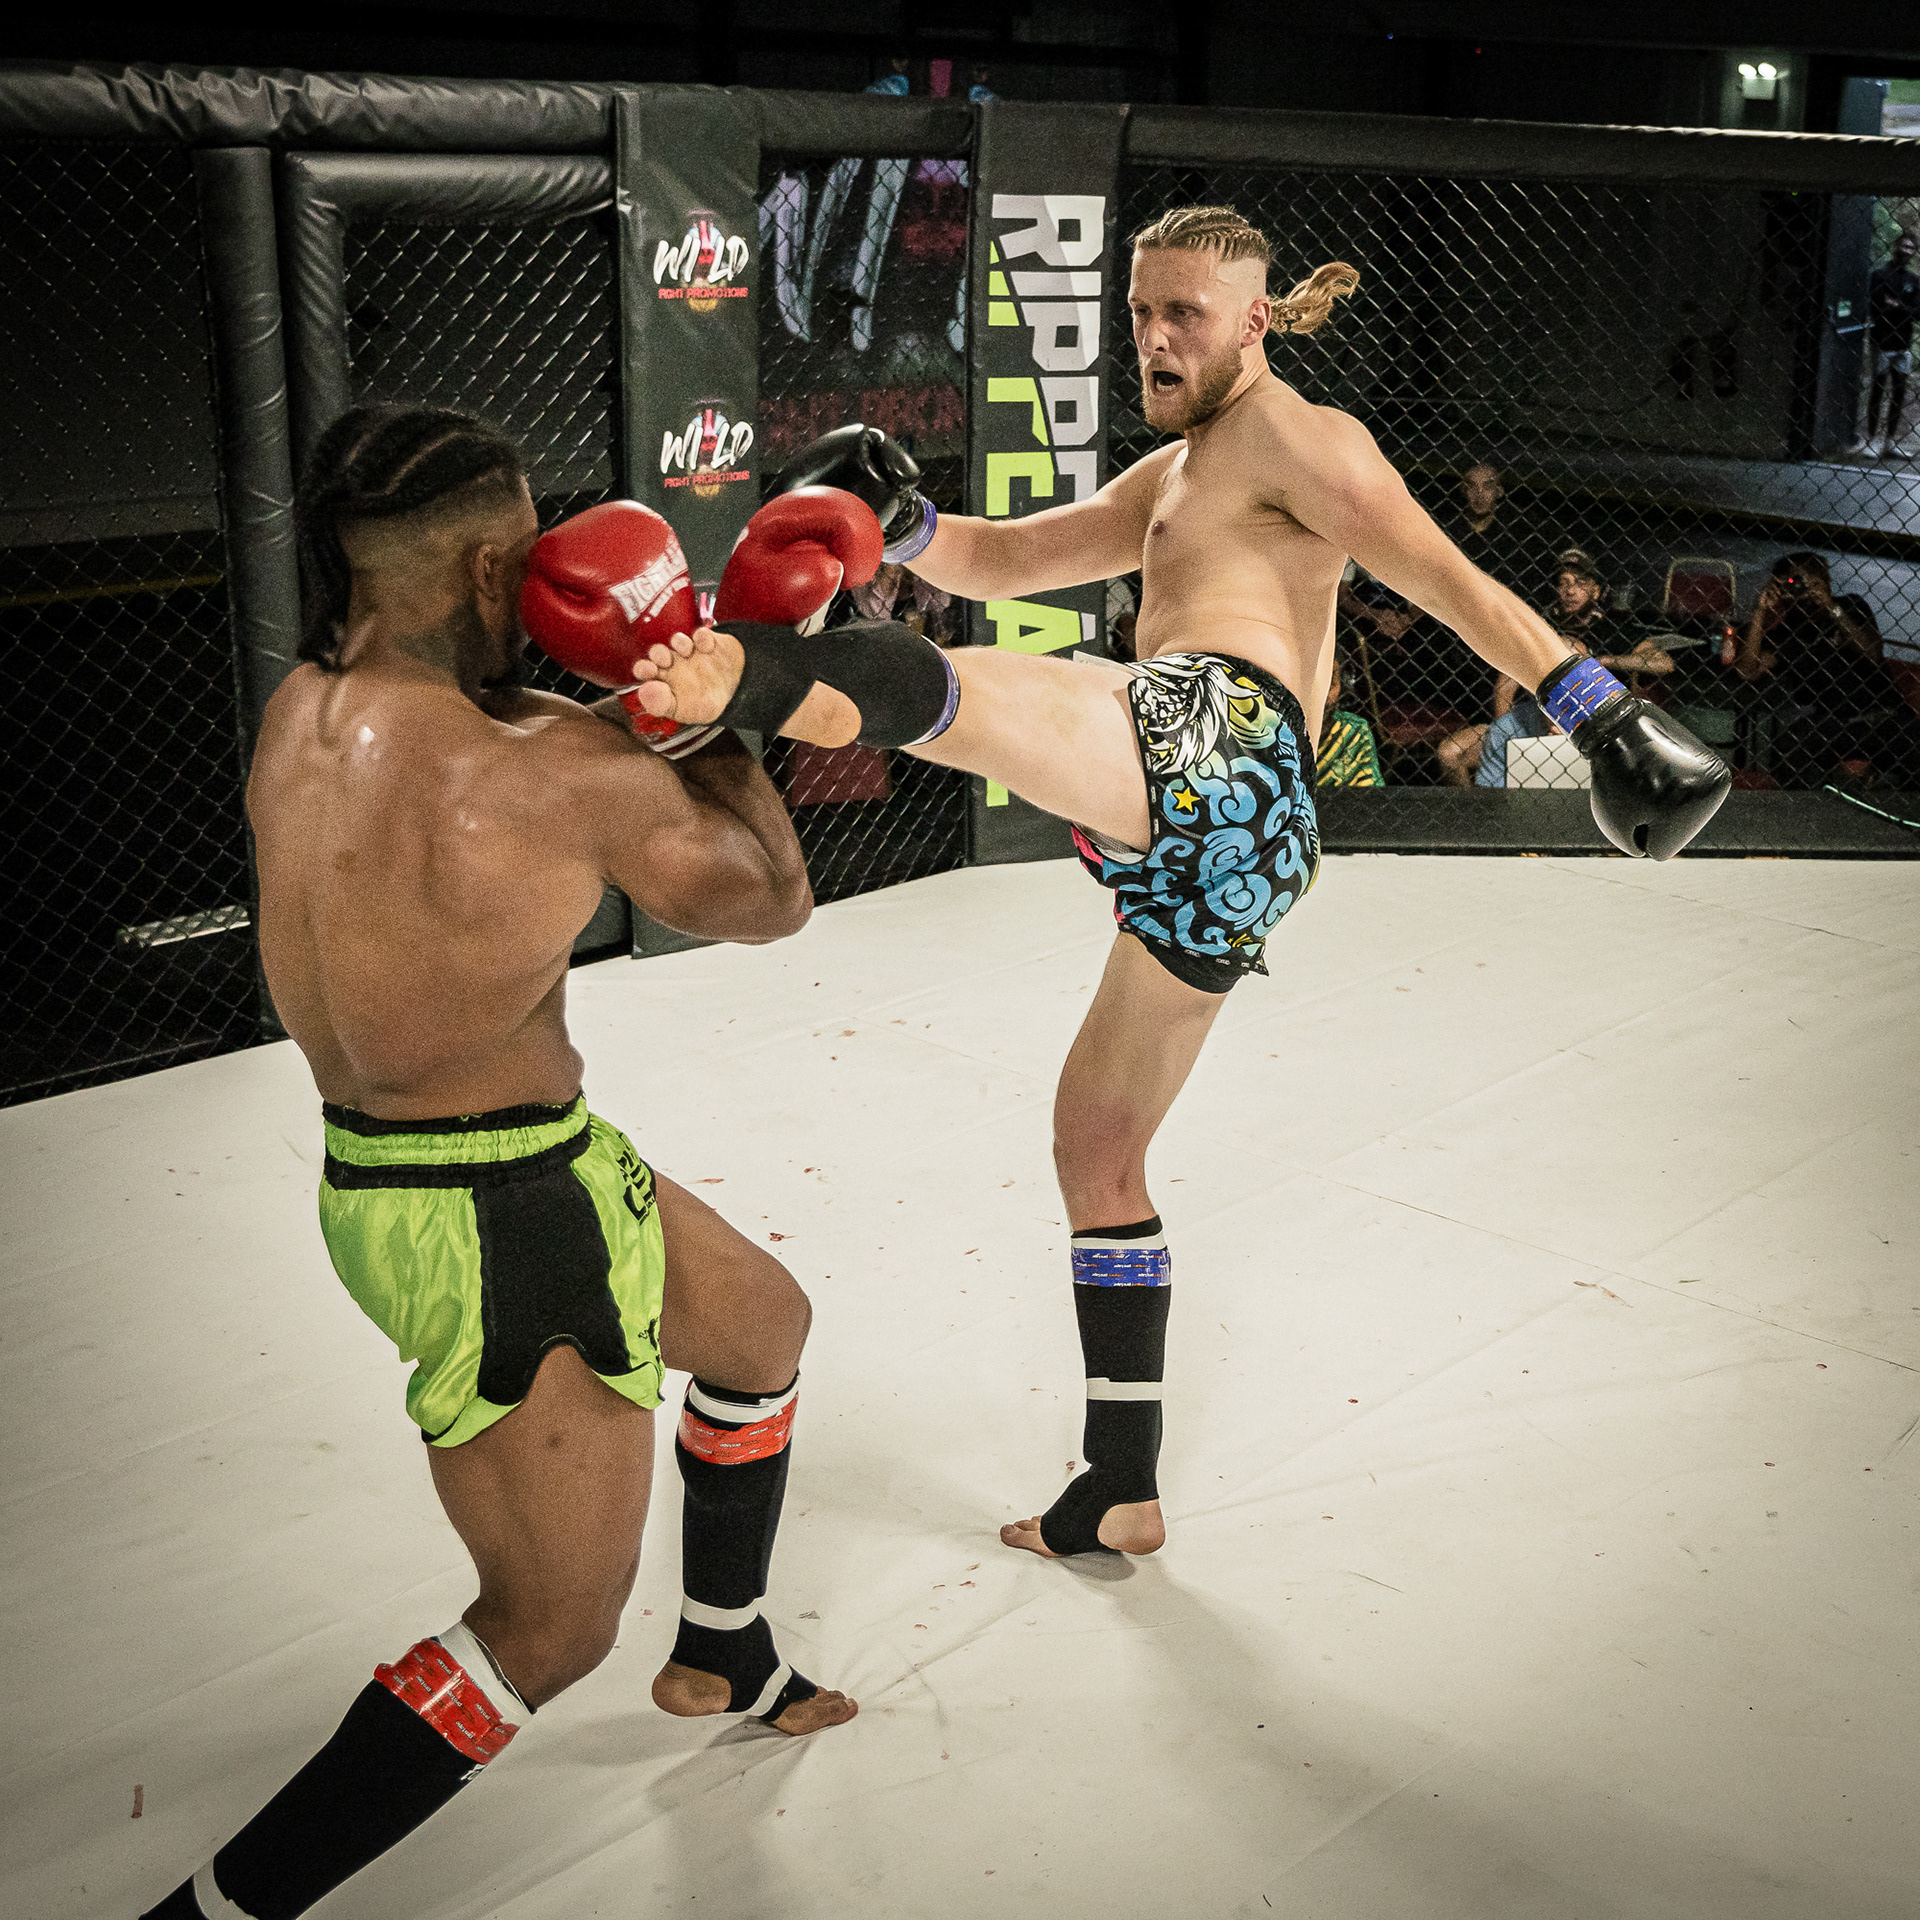
F4.0, 1/800 sec, ISO 2,000 @36mm
Capturing Emotions in the Cage
MMA is as much about the fighters’ emotions as it is about the physical combat. Capture the determination, exhaustion, triumph, and defeat. Look for moments of interaction between fighters and their coaches, and the reactions of the audience. These candid shots can tell powerful stories and add depth to your portfolio.
Pay attention to post-fight moments, such as the announcement of the winner and the immediate reactions, which can be highly emotive and visually compelling.

As soon as that final bell goes, or a win is guaranteed, be prepared to capture that release of raw energy!
F4.0, 1/800 sec, ISO 2,500 @39mm
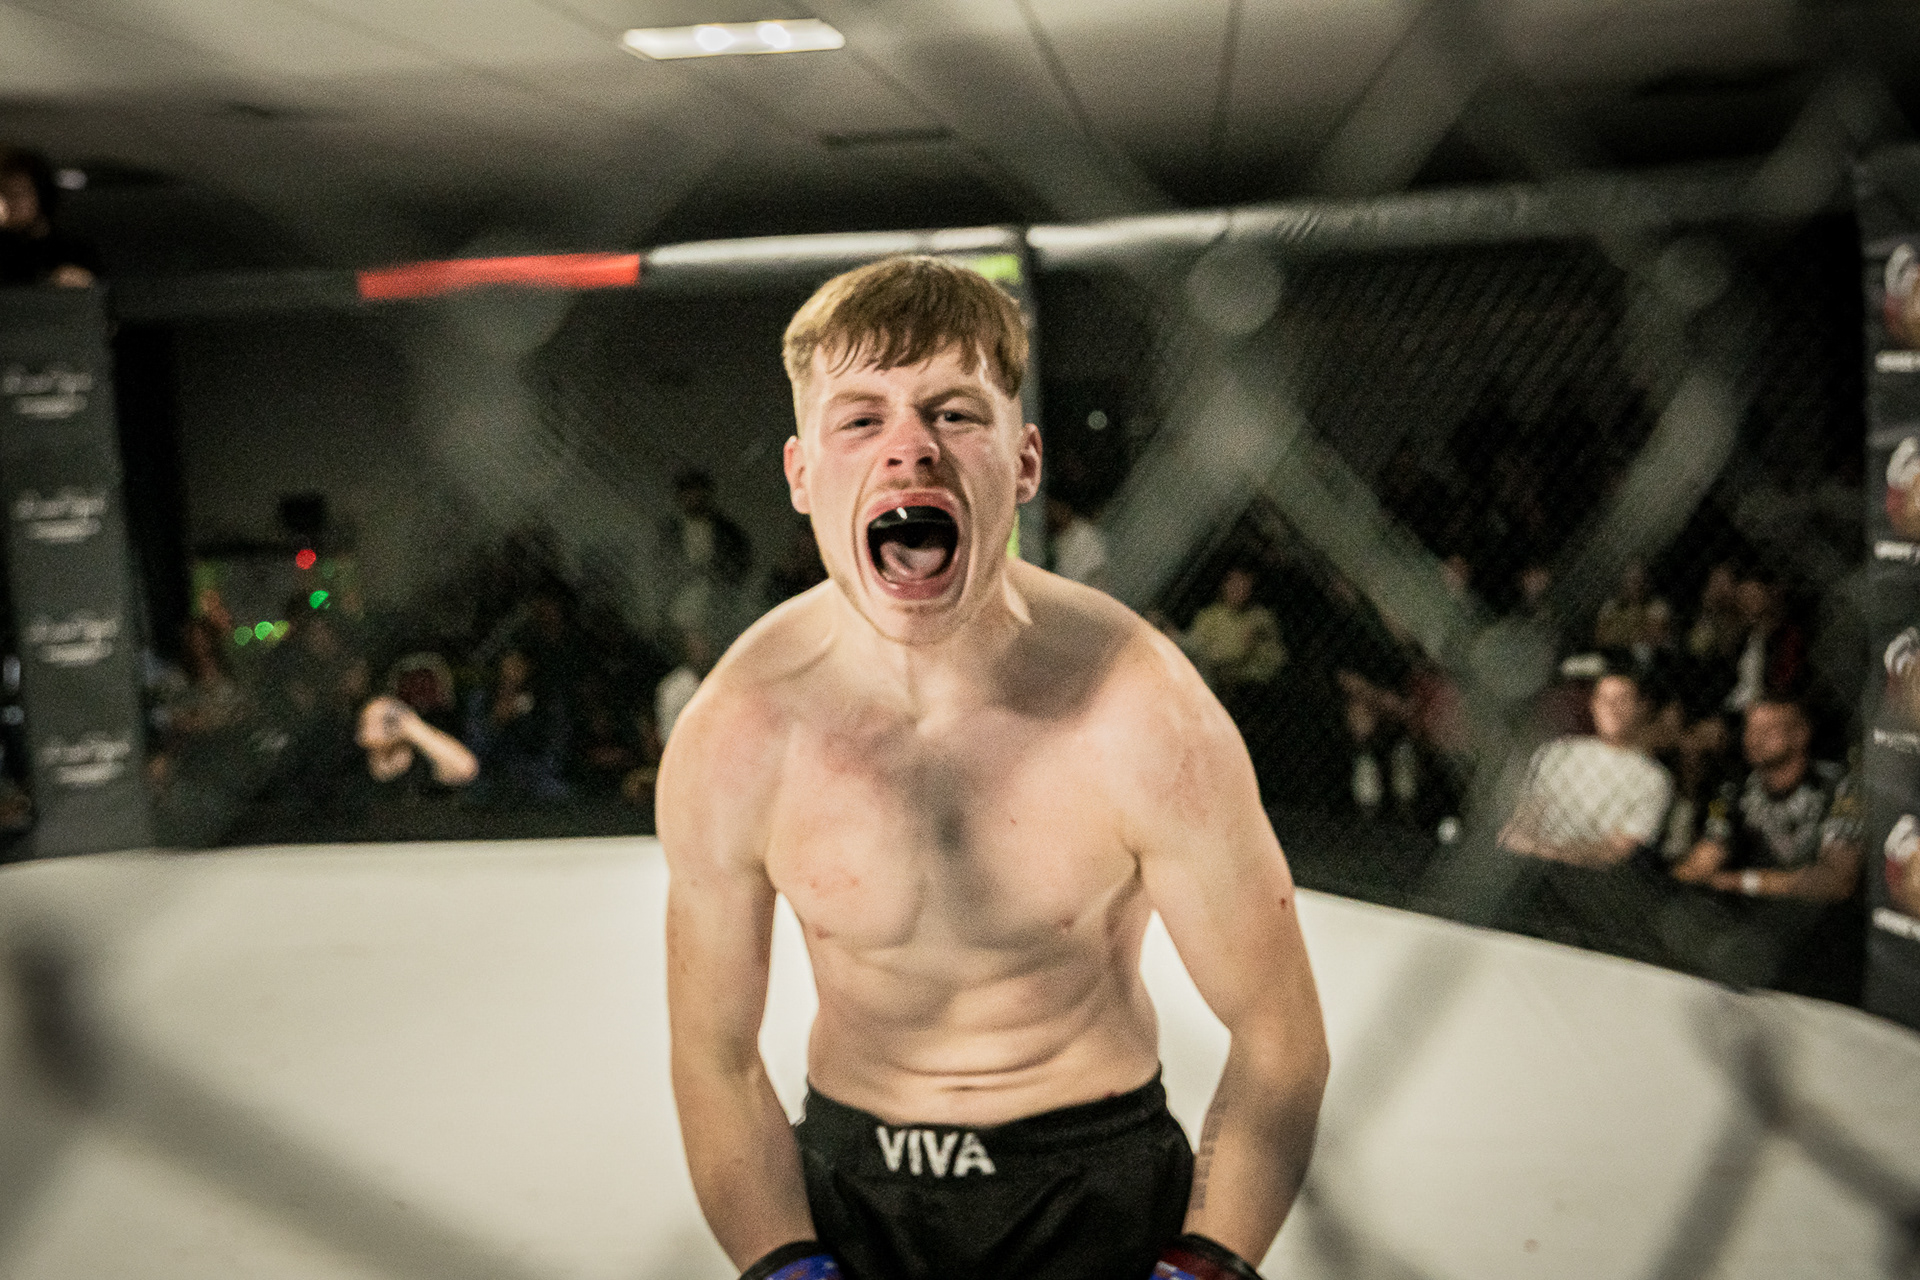
Always looking for the camera man!
F4.0, 1/800 sec, ISO 4,000 @44mm
Safety First: MMA Safety Tips
Stay alert and respect the boundaries set by the organisers. Be aware of your surroundings and avoid putting yourself or others at risk. Follow all safety protocols to ensure a safe shooting environment. Always be mindful of the fighters and officials, and avoid obstructing their view or movements.
Wear appropriate clothing and shoes that allow for quick movement and comfort during long hours of shooting.
The Post-Processing Touch
Editing is where the magic happens. Fine-tune your photos, enhance colours, and correct any imperfections. Use Lightroom to adjust exposure, highlights, shadows, sharpness, saturation, contrast, and colour tones. Use On1 Noise AI to quickly remove noise from high ISO images. Consider converting some images to black and white to highlight the raw emotion and intensity of the fights.
When cropping, maintain the original aspect ratio to avoid distorting the image. Use sharpening tools sparingly to enhance details without introducing artefacts.
Learning from the Pros
Seek advice from experienced MMA photographers. Their insights and tips can be invaluable in improving your skills and techniques. Join photography forums, attend workshops, and study the work of renowned sports photographers to gain new perspectives and inspiration.
Participate in online communities and critique groups to receive feedback and learn from others' experiences.
Ethical and Legal Considerations
Respect the privacy and rights of the fighters and event organisers. Obtain necessary permissions and adhere to copyright regulations. Maintain a professional and ethical approach in your photography. Avoid publishing photos that could potentially harm the reputation of the fighters or the sport.
Always credit the event organisers and fighters when sharing images on social media or other platforms.
Building Your Portfolio
Curate a selection of your best shots to showcase your talent. Share your work on social media, photography forums, and with MMA organisations to build your reputation and attract potential clients. A strong portfolio can open doors to new opportunities and collaborations within the MMA community.
Consider creating a dedicated section on your website for MMA photography, highlighting your best work and client testimonials.
Networking and Marketing
Forge connections with MMA gyms, fighters, and promoters. Market your services through a professional website, social media, and by attending events. Building a strong network can lead to exciting opportunities in the world of MMA photography. Consider offering your services for free or at a discounted rate initially to build your portfolio and gain experience.
Attend MMA events as a spectator to meet potential clients and network with other photographers and industry professionals.
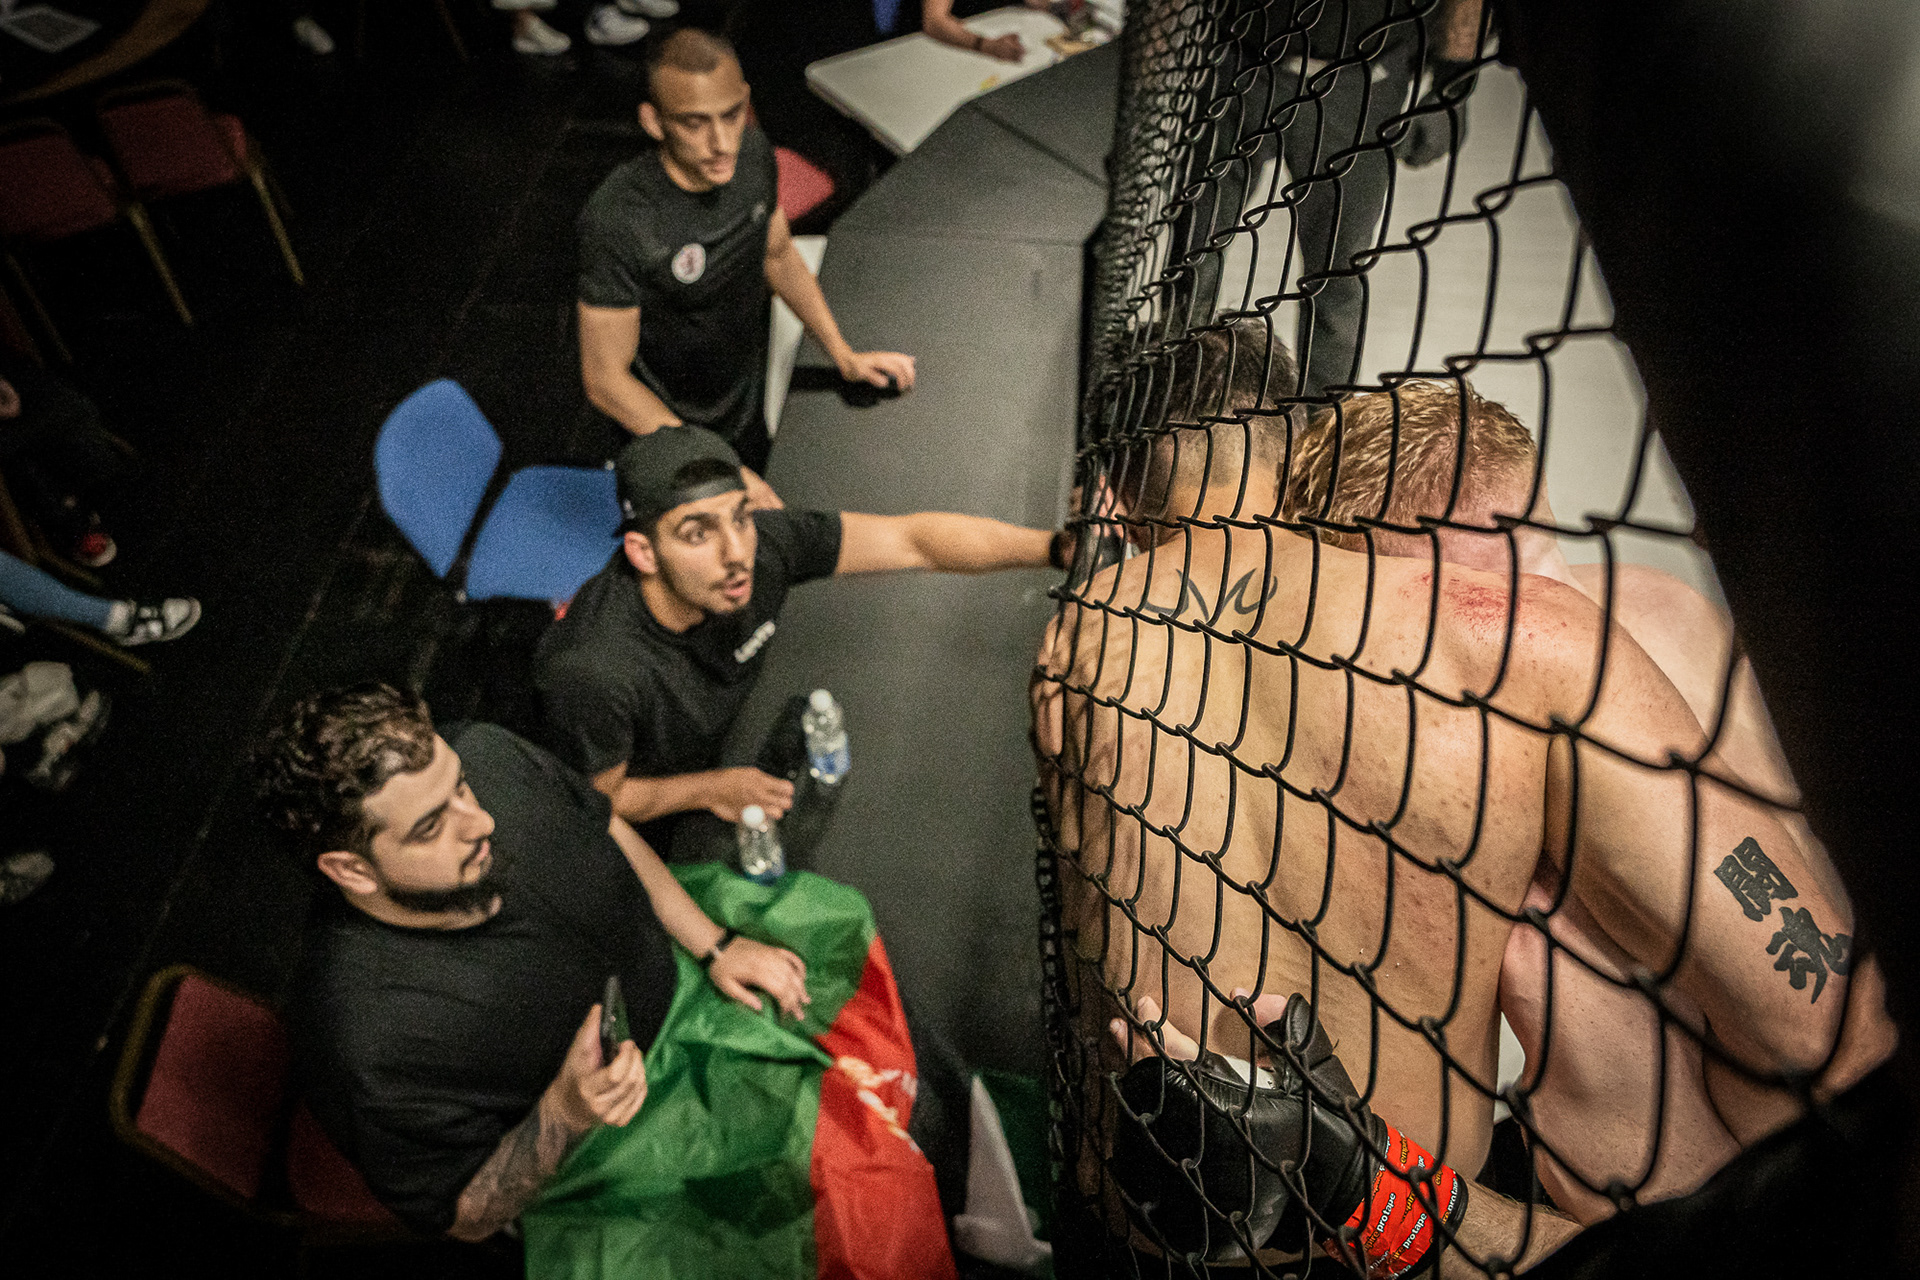
The most popular images are always ones that include the cornermen and support teams. This is a great way to give back to the teams as it isn't always just about the punches in the ring.
F4.0, 1/800 sec, ISO 5,000 @24mm
F4.0, 1/800 sec, ISO 3,200 @48mm
In Conclusion
Photographing MMA events from cage-side is a thrilling endeavour that demands dedication, knowledge, and practice. The results are breathtaking images that tell stories of courage and determination. Armed with these strategies, you’re ready to step behind the cage and capture the heart-pounding moments that define the world of MMA. Let your camera be your ticket to an extraordinary world of raw emotion and relentless spirit.
Additional Tips
- Keep experimenting with different perspectives, focal lengths, and venue locations for variety.
- Tell a story from the preparation to grand entrances, the venue, the atmosphere, and the winners and losers.
- Be mindful of background distractions, particularly lighting and ringside elements.
- Maintain communication with contacts, sharing images and engaging with the community post-event. Fighters will want to use the images, promoting your work on social media.
Ending Comments:
I hope this guide has inspired you to try this fantastic genre of photography. It brings many challenges that help develop essential skills applicable across various photography areas. I plan to continue this project and develop further, so keep an eye out for future shoots and blog posts on this website.
I hope this guide has inspired you to try this fantastic genre of photography. It brings many challenges that help develop essential skills applicable across various photography areas. I plan to continue this project and develop further, so keep an eye out for future shoots and blog posts on this website.
If you have any questions or tips to share, please feel free to contact me using the methods provided on the website panel.
Thank you, stay safe, and happy shooting!
Martin
Want to learn more?
Want to see more images like this?
Here is a link to my most recent galleries on my Facebook Photography page:
Looking for further advice and inspiration, head over to:
Like what you see and want any of my images as a print up to A3, please contact me?
To learn more about Martin Duffy head over to: