
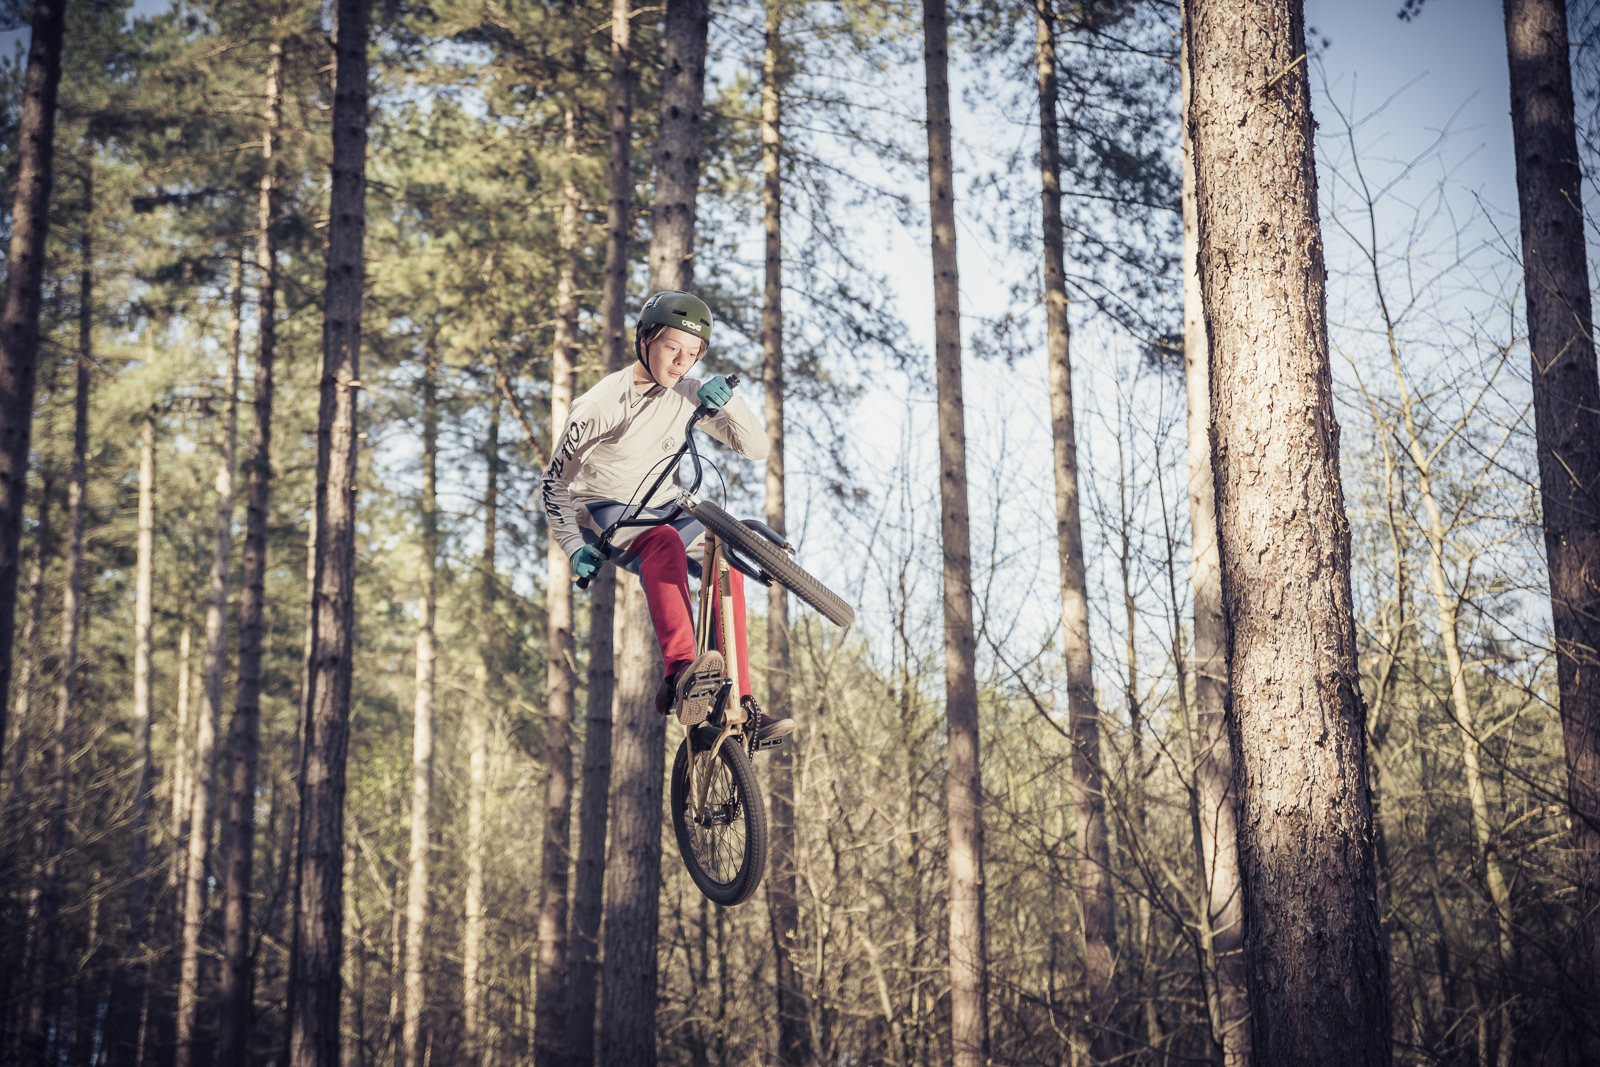
Sherwood Pines Jump Park, Notts. Settings: F2.8, 1/1000 sec, ISO 160 @59mm - 2 x Speed Lights
Do you have a passion for mountain biking? If you do, you know that there's nothing quite like the thrill of conquering rugged trails, the wind in your hair, and the world whizzing past you. But what if you could freeze those moments in time? Mountain bike portrait photography allows you to do just that - it lets you capture riders in action, preserving the adrenaline-pumping, heart-pounding excitement forever. In this article, we're going to delve into the art of mountain bike portrait photography, sharing tips and techniques that will help you create engaging portraits of mountain bikers in their element.
The Challenge of Action Portraits
As any photographer will tell you, capturing action shots can be a challenging endeavor. When it comes to mountain bike portrait photography, you're not just dealing with motion; you're also contending with the unpredictable terrain and ever-changing lighting conditions. But fret not - it's entirely doable, and it's incredibly rewarding when you get it right.
Choosing the Right Location
Location is everything in mountain bike portrait photography. Choose a backdrop that not only complements the rider but also adds to the drama of the shot. Dense forests, rocky trails, or winding paths can provide the perfect canvas for your masterpiece. The backdrop should be as dynamic as the sport itself.
I'm very lucky to live on the outskirts of Sherwood Forest, North Nottinghamshire, and even better I am only within 10 minutes’ drive from Sherwood Pines. Sherwood Pines is a fantastic facility ran by Forestry England and is a mecca for cycling enthusiasts up and down the country. I visit this fantastic facility with my family, be it for dog walks, building dens, mountain biking, running or taking the kids onto the Go Ape tree top adventure facility.
For those of you who are interested to read more about Sherwood Pines full details can be found here:
The facility has a number of mountain bike trails, a bike shop, a cafe, a number of kids play parks and outdoor adventure facilities and an abundance of woodland trails to explore - it's a great day out whatever your interests.
Parking for a full day is £8.00, prices taken spring/summer 2021.
Forward Planning
In the summer of 2020, I scoped out the far end of the mountain bike red trail, here you will find the downhill section and jump park. It must be noted that the walk from the car park and main facility is about 2 miles, or 45 minutes’ walk. So, grab a coffee from the cafe and some snacks/lunch as there are no facilities at the far end of the park if you plan on spending the day down there. The walk is relatively flat, along well-formed trails, however you will need to take a walking route map or map like plotaroute.com on your phone to navigate your way there - there are no signposts!
The jump park hosts a fantastic community of friendly riders from all over the area, who all look out for each other and are very open for a chat. The jump park consists of 3 levels of jump runs, going from easy to medium to insane. Riders tend to be from 1 of 2 camps, one being the riders who stop here as part of the red trail and hang round here for 15 minutes do a few jumps and carry on with the trails. The second group being the committed riders who head down to the far end of the park just to hit the dirt jumps and often spend a good amount of time here (these are the riders you want to approach and photograph).
I learnt from speaking to the locals that Sunday is the best day to visit, come rain or shine. Sunday seems to be the day everyone meets to jump and chill out. I suggest the peak times to capture jumpers is from 1pm onwards until the evening.
Also, light is key. If it's too sunny the gaps in the trees can provide challenging and often distracting highlights, so the best light tends to be late afternoon or on those slightly overcast days.
The Equipment You Need
You don't need to break the bank on camera gear to get great mountain bike portraits, but having the right equipment does make a significant difference. A DSLR or mirrorless camera with a fast shutter speed and good low-light performance is ideal. Pair it with a telephoto lens to capture those action shots from a distance. Don't forget to bring a sturdy tripod - it's your best friend when it comes to keeping those shots sharp.
The joy of mountain bike, BMX and Jump Bike jump shooting is the amount of options you have. In terms of lenses, I pack everything from 14mm for those crazy wide angles all the up to 200mm. I have learnt that when shooting, if you can capture the rider with the ground in shot it seems to anchor the subject in the image and gives a better sense of height - so go wide. Without the ground in shot it can look a bit 'ET' like.
Camera Body, 3 x Sigma lenses (see my gear list), 2 x flash units, 1 x trigger, 2 x tripods for flashes, lots of batteries (I tend to get through 3 sets of AA batteries per flash unit in a day).
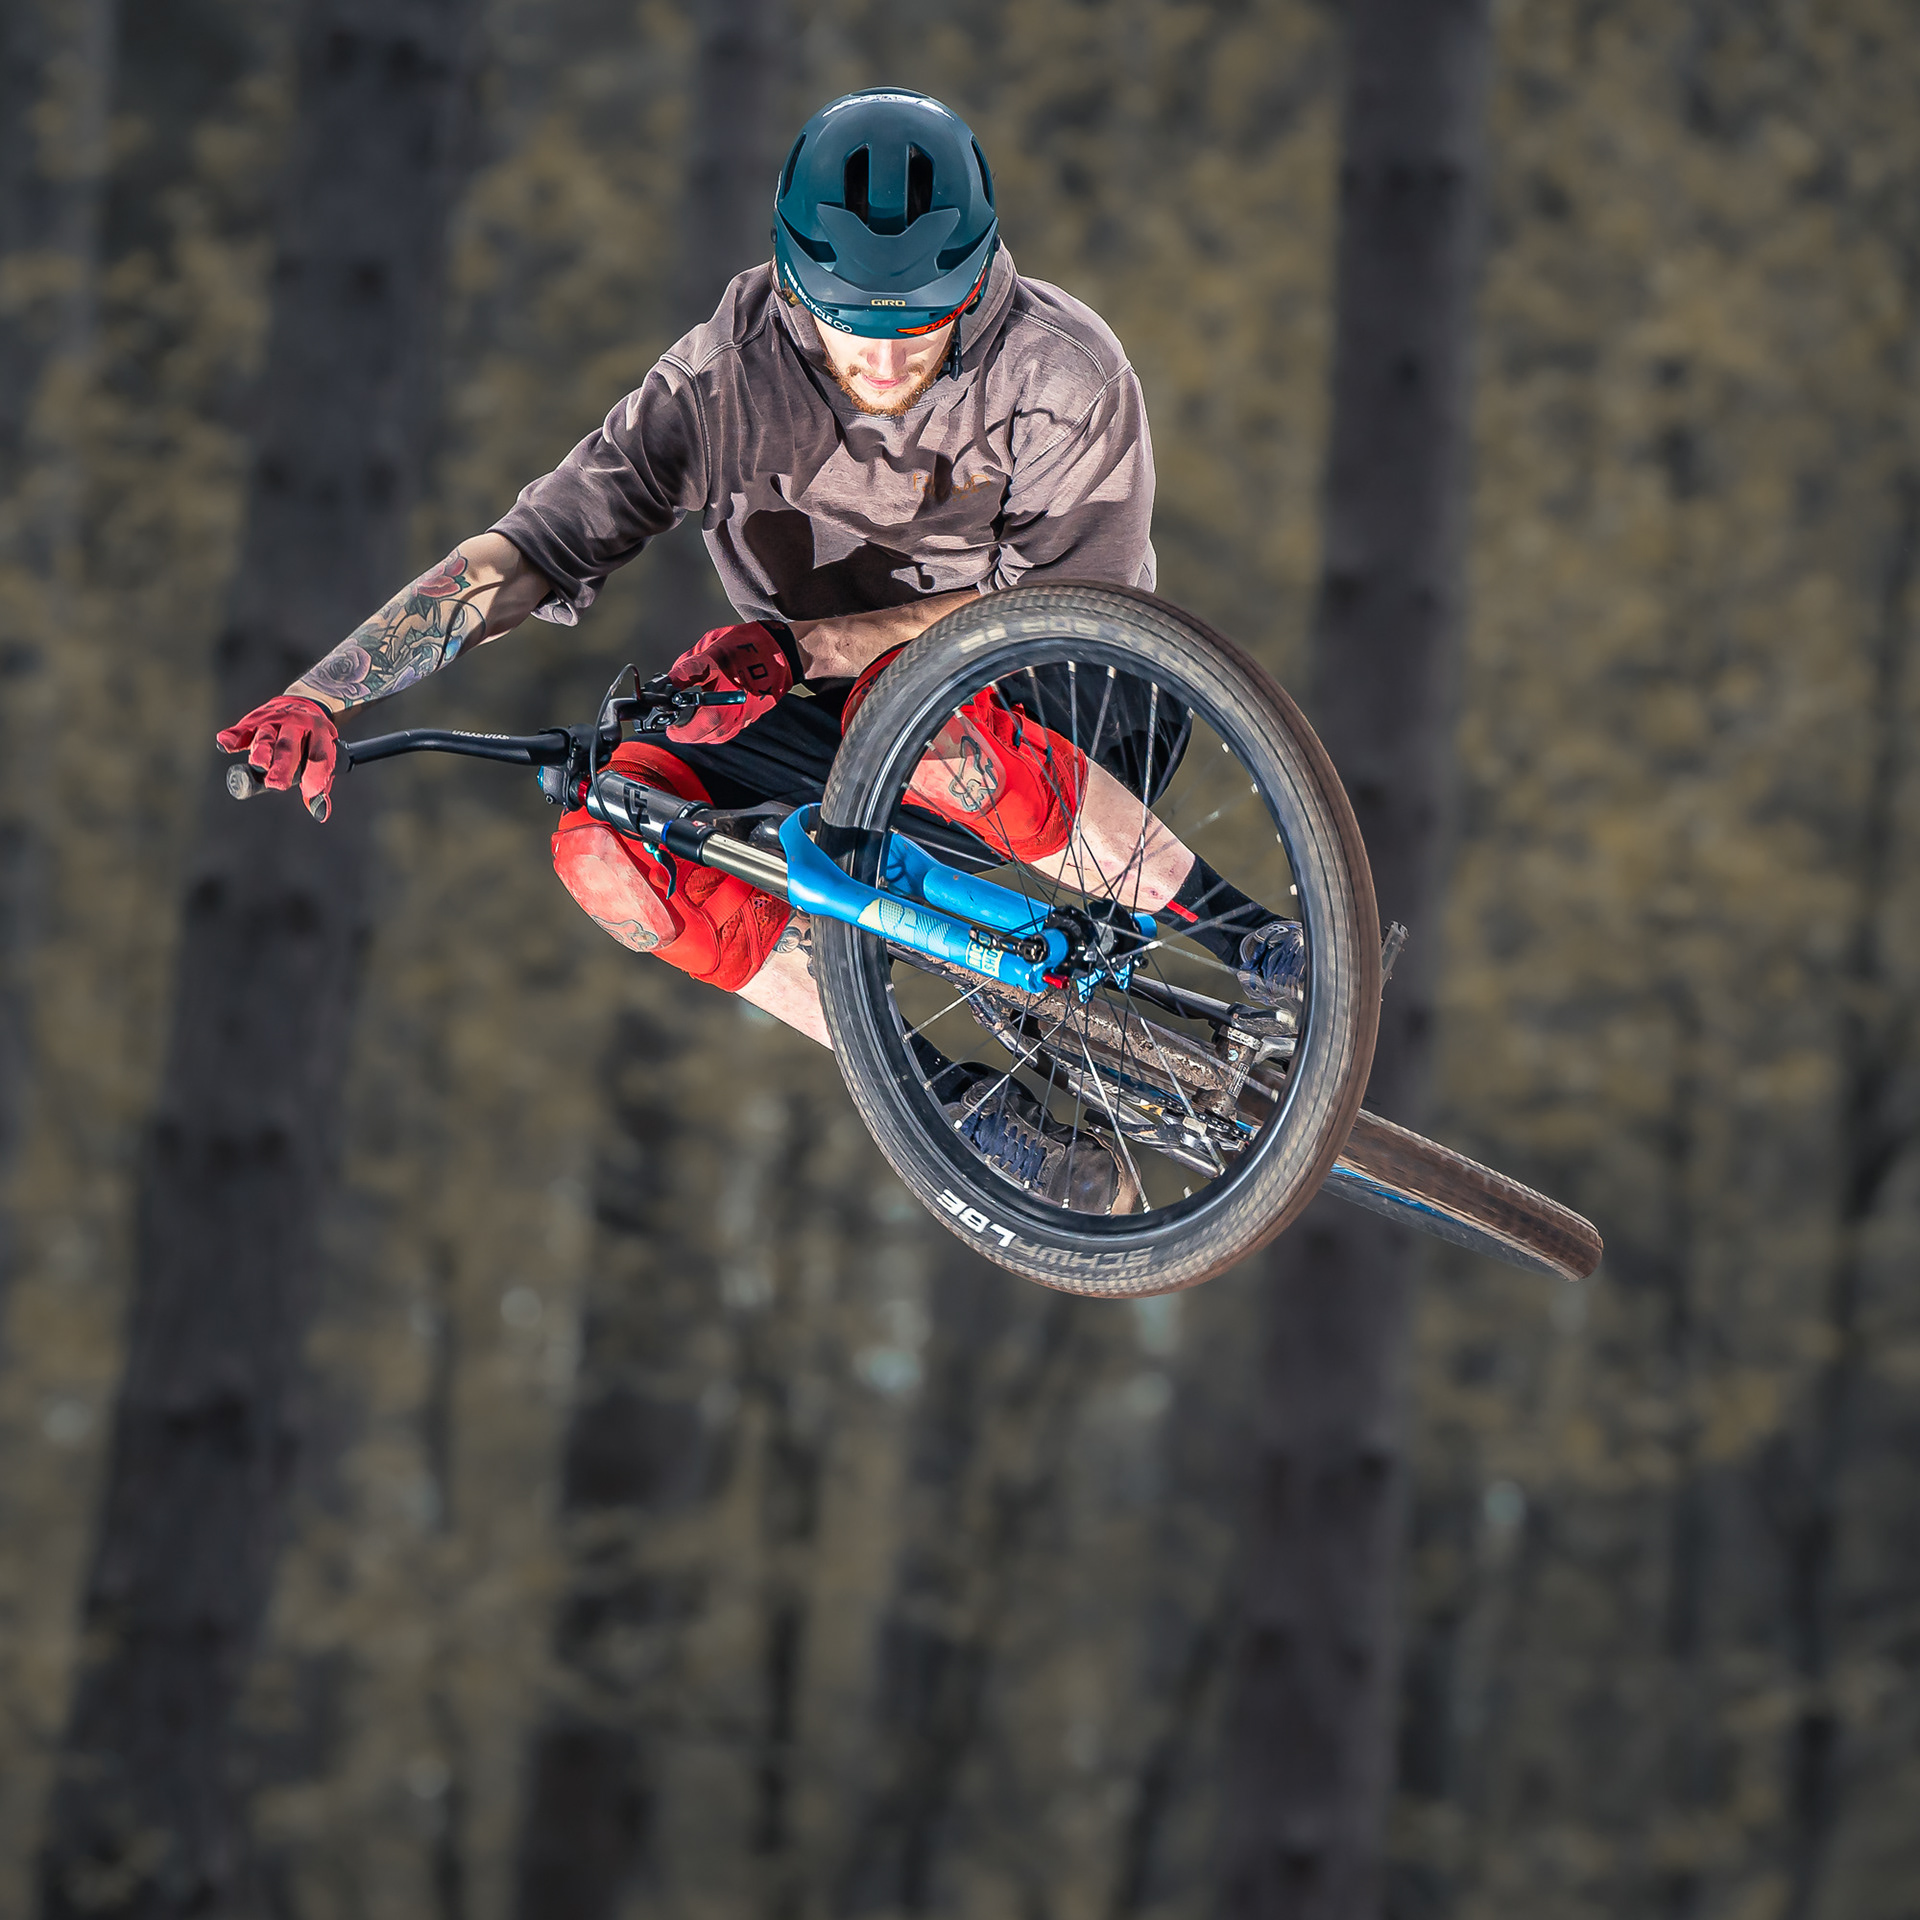
Sherwood Pines Jump Park, Notts. Settings: F4, 1/1000 sec, ISO 400 @200mm - 2 x Speed Lights
On Location
Relax, be you, be prepared to have a chat with the riders, introduce yourself, tell people what you are doing and swap contact details. Remember, the more you fit in the more receptive the riders will be and open to supporting you create fantastic images.
Mastering Camera Settings
To freeze the action, start with a fast shutter speed, typically 1/1000th of a second or faster. But remember, high shutter speeds require more light, so you might need to adjust your ISO and aperture accordingly. It's a delicate balance between freezing motion and maintaining image quality.
Camera Settings: I always have my camera loose, not tripod mounted, as you need to be flexible and quick, often getting into awkward bends and poses. My camera is set to manual, usually between F2.8 and F4, shooting at 1250 sec and Auto ISO (limited to 3400 ISO). The camera's shoot mode I tend to keep to single shooting as when on burst mode the flash can't keep up, so I aim to keep my timing to that critical shot rather than machine gunning.
The Sigma 2.8 Art 24-70mm is also a good all-rounder when you want flexibility from close ups to wider angles when you are stood at the side of the jump. The lens is fast and gives you the most amount of flexibility when shooting close.
Another great technique to try, and a way to produce more dynamic images but often more challenging, is to drop that shutter speed right down. I drop my shutter speed down to 1/40 or even 1/30 of a second, ISO 100 and F9 to F11 and pan with the rider. This creates a great sense of movement yet keep the riders face in focus and sharp. A real challenge but great sense of speed produced. This technique works really well with those wide angles, so I use my Sigma 2.8 Art 14mm to 24mm lens and shoot at 14mm, have a play around and get creative.
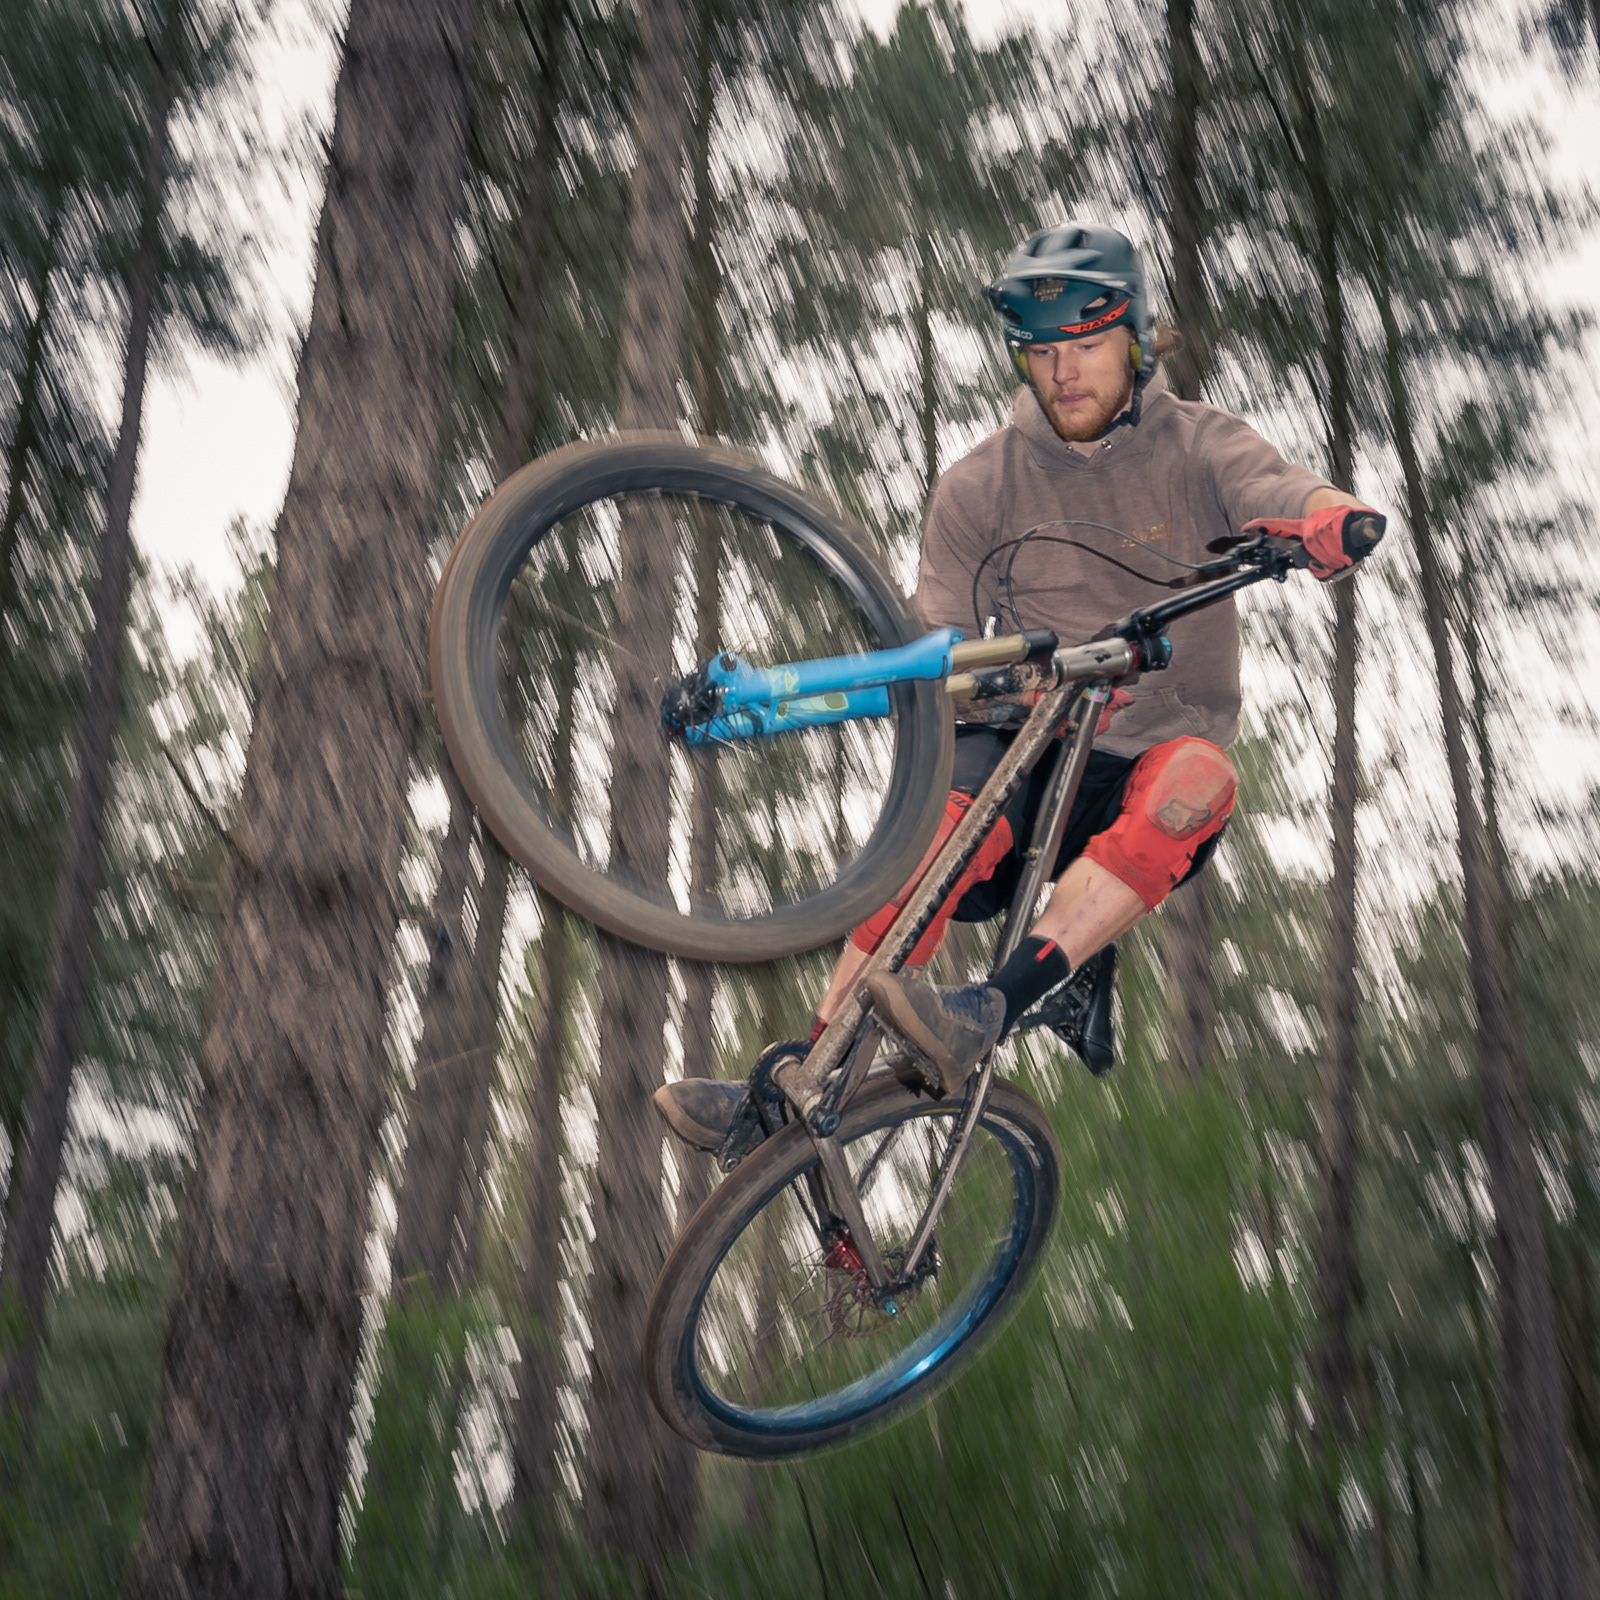
A slow shutter speed at 1/80 sec on my wide angle Sigma 14-24mm 2.8 Art brings a great sense of speed to an image.
Sherwood Pines Jump Park, Notts. Settings: F11, 1/80 sec, ISO 400 @14mm - 2 x Speed Lights
My other favourite technique is to leave your flash units setup (as detailed below) and stand at the bottom of the jump run and shoot back up the track section so the riders are coming towards you. Using the Sigma 2.8 Sports 70-200mm I pre-focus on the jump where my light stands are and count the riders in to the jump where my flash are ready. The idea is to time and capture the riders mid-air at 200mm when they perform their aerial acrobatics. This is a great method for minimalising background distractions and works really well when the rider crosses their bike up in the air producing some great shapes and facial expressions.
Using Flash(es) for Bike Photography
Flash photography can elevate your dirt jump bike shots by freezing motion, enhancing details, and adding drama. Here's a quick guide on how to use flash effectively in this high-action setting.
Why Use Flash?
1. Freeze Motion: A flash can capture the fast-paced action of dirt jumping, ensuring crisp, sharp images.
2. Enhance Details: Highlight textures in the rider's gear, the bike, and the dirt, which might be lost in ambient light.
3. Add Drama: Create strong contrasts and dramatic lighting effects that emphasize the intensity of the jumps.
Essential Equipment
1. Speedlight/Speedflash: Use a portable, HSS-capable flash for freezing fast action.
2. Wireless Triggers: Essential for off-camera flash setups, giving you flexibility in light placement.
3. Modifiers: Softboxes or diffusers can help control and soften the light.
1. Speedlight/Speedflash: Use a portable, HSS-capable flash for freezing fast action.
2. Wireless Triggers: Essential for off-camera flash setups, giving you flexibility in light placement.
3. Modifiers: Softboxes or diffusers can help control and soften the light.
Flash Settings
1. Manual Mode: Start with the flash at 1/4 power and adjust as needed.
2. Shutter Speed: Use around 1/200s to 1/250s, or faster if using HSS.
3. Aperture: Set between f/2.8 and f/8, depending on the desired depth of field and lighting conditions.
4. ISO: Keep ISO low (100-200) to reduce noise.
1. Manual Mode: Start with the flash at 1/4 power and adjust as needed.
2. Shutter Speed: Use around 1/200s to 1/250s, or faster if using HSS.
3. Aperture: Set between f/2.8 and f/8, depending on the desired depth of field and lighting conditions.
4. ISO: Keep ISO low (100-200) to reduce noise.
When to Use Flash
1. Low Light: Use flash during dusk, dawn, or in shaded areas for clear shots.
1. Low Light: Use flash during dusk, dawn, or in shaded areas for clear shots.
2. Backlit Conditions: Flash helps illuminate the rider when the background light is too strong.
3. Creative Effects: Use flash for techniques like rear curtain sync to create motion trails.
Flash Placement
1. 45-Degree Angle: Position your main flash at a 45-degree angle to the rider for natural, directional light.
2.Backlighting: Place a flash behind the rider to create a rim light, separating them from the background.
3. Overhead: An overhead flash can highlight the rider and bike during mid-air tricks.
Using flash in dirt jump bike photography can help you capture dynamic, detailed, and dramatic images. By mastering your equipment, settings, and flash placement, you can significantly enhance the quality of your action shots. Experiment with different setups to find what best captures the energy and excitement of dirt jumping.
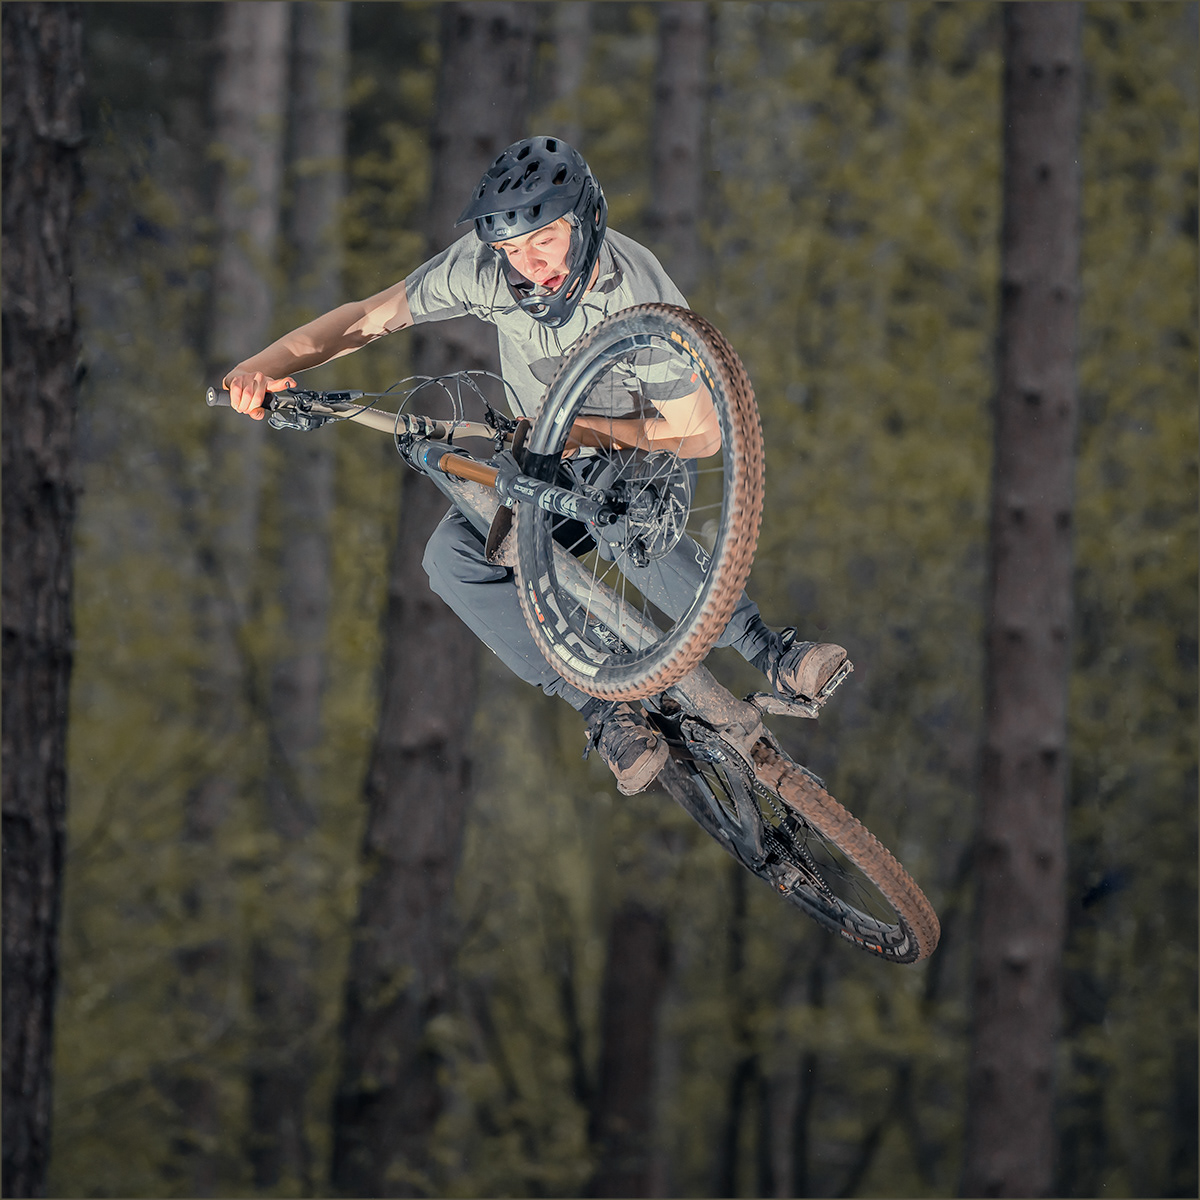
Shooting down the jumps at 200mm on my Sigma Sports 2.8 70-200mm produces some great uncluttered images.
Sherwood Pines Jump Park, Notts. Settings: F4, 1/1000 sec, ISO 640 @200mm - 2 x Speed Lights
The important setting to settle on is the focus spots and focus mode. With focus spots a 'focus wide' setting often misses, 'tracking focus' tends to treat the subject as static and the moving tree's as the focal point when your panning so I tend to either pre-focus or have a 'spot focus' enabled and shoot on continuous or manual focus. After practice you can begin to nail the shot more frequently - and be prepared to have a number of missed and out of focus shots.
My flashes are both mounted on tripods and depending on the light I use small 6" soft boxes on them to help diffuse the light. On brighter days I tend to shoot on 1/1 full power, however on duller days I will shoot at half this. I position 1 light 90 degrees to the exit of the jump to light the subject and the 2nd on the other side of the jump pointing upwards to catch the riders face and eliminate harsh shadows from the 1st flash. The flashes both fire at the same time and I can adjust each flash independently to adjust the power, which I quite often do if the light is too harsh blowing out skin tones etc. The tripods stand to the side of the jump, so they aren't in the way or pose a risk if the rider were to fall.
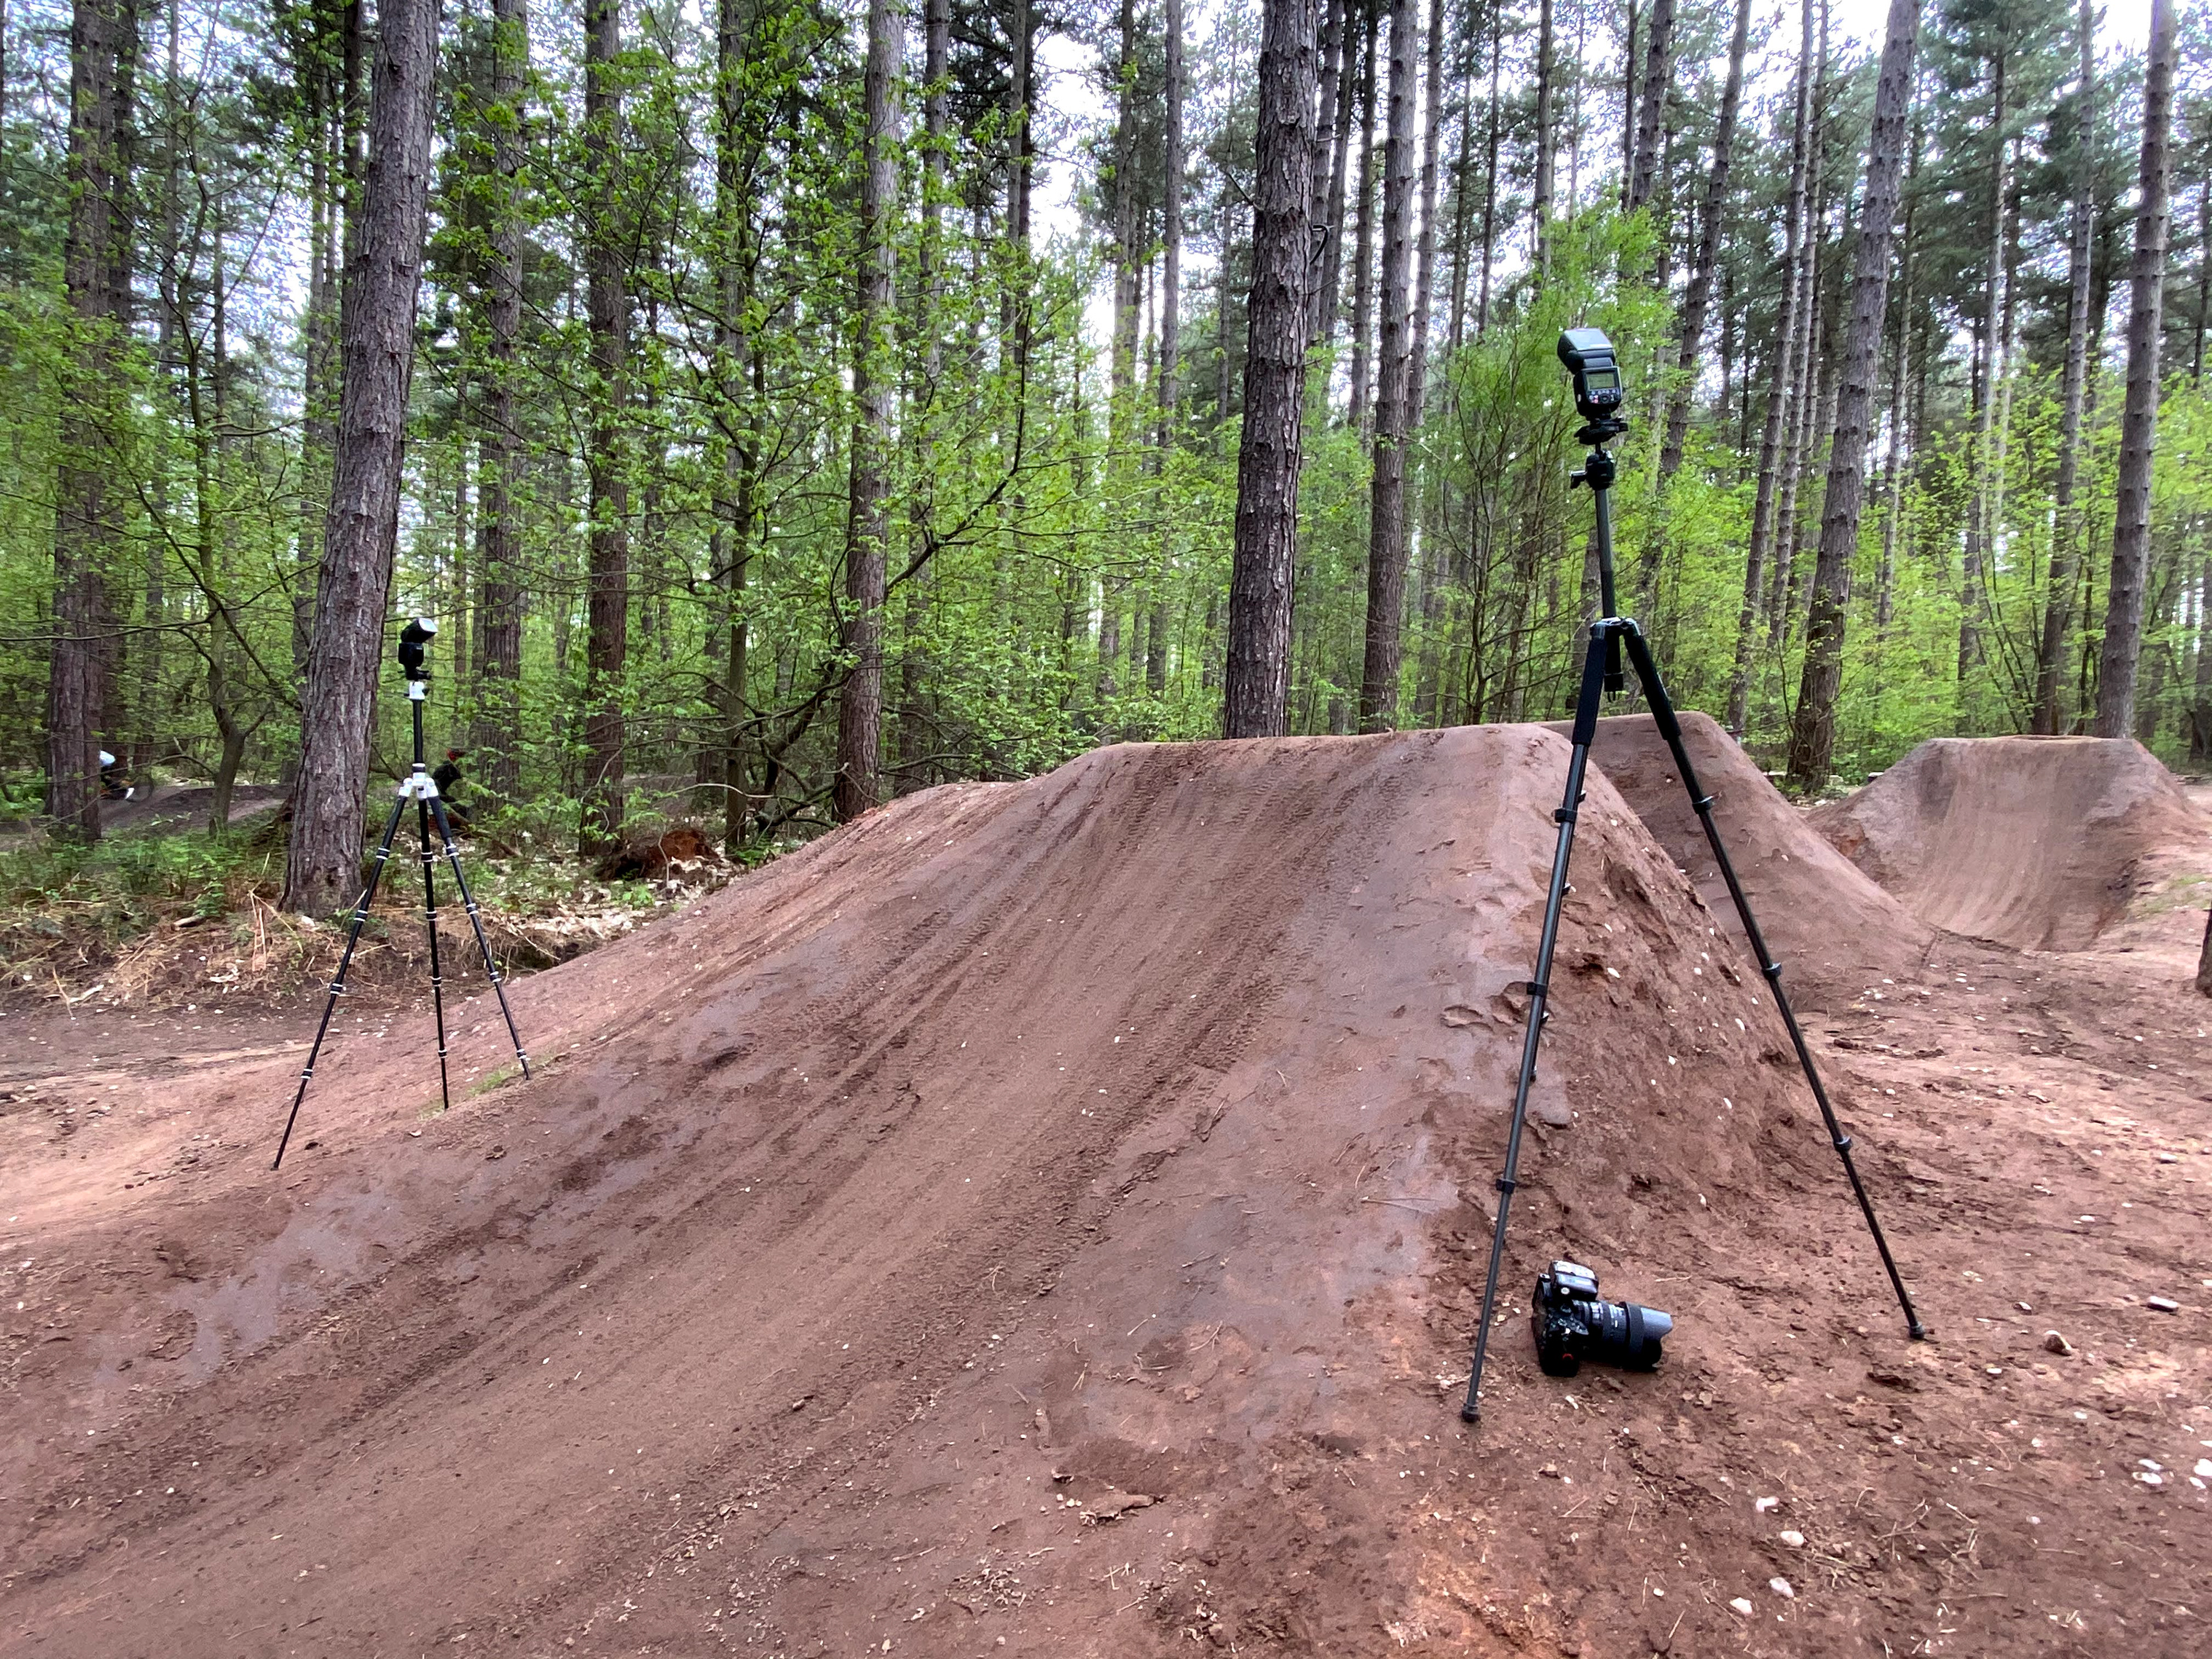
The jump set-up with flashes on tripods on both sides of the jump
Video Experience - What it's like stood at the foot of the jump at the typical angle I shoot from
I position myself to the side of the two flash units and either crouch on the side of the jump, or just to the side of the jump landing to capture different angles of the rider. There are numerous positions you can adopt and experiment with to achieve different results. I personally like the rider just at the peak of the jump returning to the landing, where more often than not you have great facial expressions, concentration and facial view.
Focus on Composition
Composition is the secret sauce in photography. Rule of thirds, leading lines, and framing can all work wonders to draw the viewer's eye towards the subject. Pay attention to where the biker will be in the frame when you release the shutter. Anticipate their movements and position yourself accordingly.
Capturing the Essence
The essence of mountain bike portrait photography isn't just about action shots. It's about conveying the emotion, the excitement, the grit of the sport. Show the determination in the rider's eyes, the dust kicked up from their wheels, and the sweat on their brow. Get close, fill the frame, and let the viewers feel the adrenaline too.
Lighting is Key
Lighting plays a critical role in any form of photography. For mountain bike portraits, the golden hours during sunrise and sunset can create enchanting, warm light that adds a magical touch to your shots. However, don't shy away from experimenting with dramatic, moody lighting, which can highlight the rider's intensity.
Remember to...
- Pack a microfiber cloth to wipe your lenses and kit down, on dry days it can get very dusty.
- Keep trying different perspectives, focal lengths and different sets of jumps. Variety is the key.
- Keep an eye on the highlights and background distractions, particularly other riders, camera equipment and flash stand etc.
- Take a pen and paper or take notes on your phone as riders will want to chat and share contact details so they can use the images and promote your work on social media. Take note of names, email addresses, bike, helmet and clothing style/colours so you can identify later.
Post Shoot
Editing software can be your best friend in enhancing the final image. Adjusting the exposure, contrast, and sharpness can make your portrait truly pop. However, remember not to overdo it; subtlety is key.
Lightroom is my go-to for image catalogue and selection. I usually upload and catalogue and leave it for a few days to look at the images with fresh eyes. I flick through the images in Lightroom and flag the images I like with colour markers, red being my favourites, blue being 'okays' and the rest being the out of focus non-keepers (which I delete).
From the images I've kept back (red and blue's) I tend to focus on one or two images and do some basic editing, adjusting the exposure, highlights, shadows, sharpness, saturation, contrast and colour tones. When I have an image style, I like I will apply these settings to all the images, giving a consistent vibe/mood to the collection of images. I will then go through the images individually and quickly crop where needed to remove distractions and then finally add a subtle dark vignette to make the subject pop a little more from the image. I may also add a light radial filter over the subject. I will then export these images into a web suitable Jpeg export, which can be emailed to the riders.
My favourite’s images, which I highlighted in red in Lightroom, I take from the base unedited RAW images and process in Photoshop applying more localised changes and corrections. I will spend more time on these images in editing to bring them up to club/external competition standard and to a place where I am happy to post on this website.
Ending Comments.
Like any skill, mountain bike portrait photography requires practice. Don't get discouraged if your initial shots don't turn out as expected. Keep experimenting, keep learning, and keep pushing your boundaries. Over time, you'll develop a unique style and an eye for capturing the essence of mountain biking.
In conclusion, mountain bike portrait photography is an art that combines technical skills with the passion for this exhilarating sport. To capture riders in their element, you need the right gear, an eye for composition, and an understanding of lighting. Practice, experiment, and most importantly, enjoy the process. Every shot is an opportunity to tell a story, to share the world of mountain biking, and to create images that resonate with both riders and enthusiasts alike. So, grab your camera, hit the trails, and capture the adrenaline-pumping moments that make mountain biking a lifestyle worth celebrating.
I'm hoping this blog article has inspired you to have a go at this fantastic genre of photography. It brings many challenges that help you develop essential skills that can be applied across and into other areas of photography. I'm hoping to continue this project and develop myself further with this style of photography, so please keep an eye out for future planned shoots and Blog posts on this website.
If you have any questions or have any ideas/ tips to share please feel free to contact me using the 'contact' methods provided on the website panel.
Thank you, stay safe and happy shooting!
Martin
Want to learn more?
This topic and guide is very closely linked to my other guides, please check them out:
Want to see more images like this?
Looking for further advice and inspiration, head over to:
Like what you see and want any of my images as a print up to A3, please contact me?
If you have any questions, comments or feedback please reach out to me using the submission form below. I know these guides have been greatly received by many and I'm always happy to help out where I can.
Thank you!